Introduction
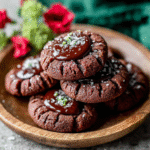
Chocolate thumbprint cookies are a delightful treat that seamlessly blend the rich, indulgent flavor of chocolate with a sweet filling. These cookies have a unique thumbprint indentation that can hold a variety of fillings, from chocolate ganache to fruit preserves, making them versatile for any dessert table.
Whether you’re seeking a festive cookie for a celebration or a simple snack to enjoy with your afternoon coffee, chocolate thumbprint cookies offer the perfect combination of texture and taste. Their rich chocolate base paired with a gooey center creates a balance that will satisfy any sweet tooth.
Ingredients
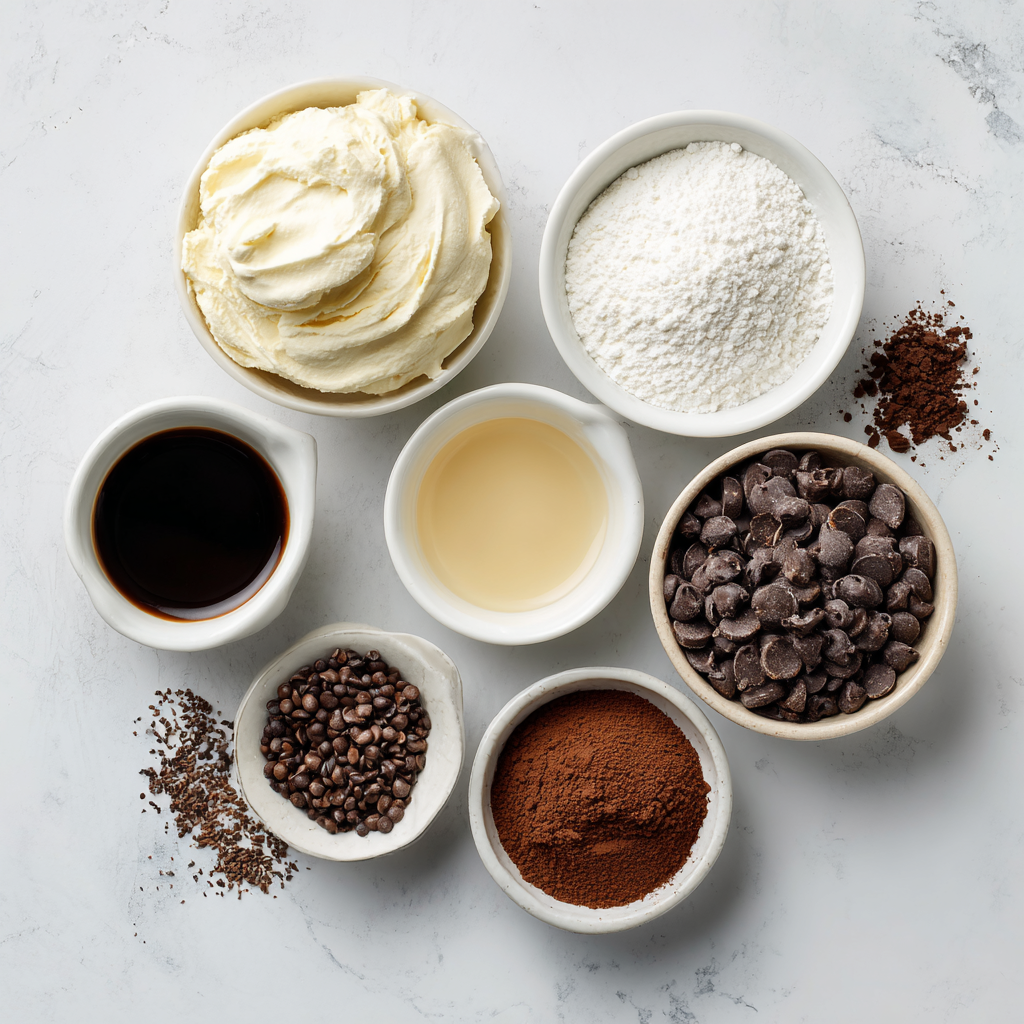
- 1 cup unsalted butter, softened
Butter provides moisture and richness, giving the cookies their tender texture. Using unsalted butter allows you to control the sodium level for a perfect balance. - 1 cup granulated sugar
Sugar helps to sweeten the cookies and contributes to browning during baking. It also aids in creating a light, tender crumb. - 2 large eggs
Eggs are essential for binding the ingredients together. The proteins in eggs help the cookies rise and provide structure. - 2 teaspoons vanilla extract
Vanilla extract adds a warm, aromatic flavor that enhances the chocolate profile. It serves to elevate the overall taste of the cookies. - 2 cups all-purpose flour
Flour is the foundation of the cookie dough, providing the necessary gluten structure. This helps the cookies hold their shape while baking. - 1/2 cup unsweetened cocoa powder
Cocoa powder gives the cookies their rich chocolate flavor and contributes to their dark color. It also adds dryness to achieve the right cookie texture. - 1/4 teaspoon salt
Salt enhances the flavors of the cookies, balancing sweetness and ensuring that the chocolate flavor shines through. - 1 cup chocolate ganache or fruit preserves
This filling creates the signature thumbprint in the cookie. Ganache offers a creamy chocolate contrast, while preserves add a fruity acidity, providing balance.
Directions & Preparation
Step 1: Preheat the oven to 350°F (175°C).
Preheating the oven ensures that the cookies bake evenly and rise properly. This step is crucial for achieving the right texture, so make sure the oven is ready before you start baking.
Step 2: In a large bowl, cream together the softened butter and sugar until light and fluffy.
Creaming the butter and sugar not only incorporates air, making the cookies lighter but also helps dissolve the sugar, leading to a smooth dough. Aim for a pale, fluffy mixture, which indicates it’s ready.
Step 3: Add the eggs, one at a time, mixing well after each addition. Stir in the vanilla extract.
Adding eggs one by one ensures even incorporation into the batter, which contributes to a uniform structure. Mixing in the vanilla alongside the eggs infuses its flavor throughout the dough.
Step 4: In another bowl, whisk together the flour, cocoa powder, and salt.
Whisking the dry ingredients thoroughly helps to evenly distribute the cocoa and salt, preventing clumps and ensuring that the chocolate flavor is consistent throughout the batch.
Step 5: Gradually add the dry ingredients to the wet ingredients, mixing until combined.
Mixing the dry and wet ingredients gradually prevents overworking the dough, which can make the cookies tough. Stop mixing as soon as no floury bits remain for the best texture.
Step 6: Scoop out tablespoon-sized portions of dough and roll them into balls. Place them on a baking sheet lined with parchment paper.
Rolling the dough into balls ensures that the cookies will bake evenly and have a uniform shape. Keeping sufficient space between them allows for spreading during baking.
Step 7: Use your thumb or the back of a spoon to create an indentation in the center of each cookie.
Creating the thumbprint is essential for holding the filling later on. Make sure the indentation is deep enough but not all the way through, as you want to maintain the cookie’s structural integrity.
Step 8: Bake the cookies for 10–12 minutes, or until the edges are set but the centers are soft.
Baking the cookies until the edges are firm prevents them from spreading too much. The soft centers will continue to firm up as the cookies cool, providing the ideal texture.
Step 9: Remove from the oven and let the cookies cool on the baking sheet for 5 minutes before transferring them to a wire rack.
Allowing cookies to cool on the baking sheet prevents them from breaking apart while hot. After a few minutes, transferring them enables complete cooling and preserves the texture.
Step 10: Once cooled, fill each thumbprint indentation with chocolate ganache or fruit preserves.
Filling the centers after baking locks in moisture and enhances flavor. Choose fillings that contrast well with the rich chocolate cookie, providing a delightful taste experience.
Perfecting the Chocolate Base
The foundation of chocolate thumbprint cookies lies in the balance of cocoa powder and sugar. Using high-quality unsweetened cocoa powder enhances the chocolate flavor without overpowering sweetness. Adjusting the amount of sugar can also alter the texture—more sugar may yield a chewier cookie, while less can produce a drier crumb. Experimenting with different cocoa varieties, like Dutch-processed or raw, can create unique flavor profiles.
Creative Filling Ideas for Your Cookies
While chocolate ganache is a classic choice, you can bring variety to chocolate thumbprint cookies with an array of fillings. Options like apricot or raspberry preserves add a fruity tartness that brightens the rich chocolate base. Consider using flavored creams or even nut butters for a surprising twist. Additionally, one can swirl in caramel or sprinkle sea salt for unexpected flavors and textures.
Baking Tips for Perfect Thumbprint Cookies
Baking temperature and time are key factors in ensuring your thumbprint cookies turn out perfectly. Oven thermometers can help ensure you bake at the correct temperature, as many home ovens can be off by a few degrees. It’s also important to keep an eye on the cookies near the end of the baking time, as they can quickly go from perfectly baked to overdone. Trust your instincts and look for slight firmness around the edges.
FAQs
How can I adjust the texture if my dough is too dry?
If your dough seems too dry, try adding a teaspoon of milk or water at a time while mixing. This will help moisten the dough without compromising the structure.
What should I do if the filling is too runny?
If your filling is too runny, consider adding a thickening agent like cornstarch or reduced cream to the filling before placing it in the cookies. This will help it hold its shape better.
Can I use different flours in this recipe?
Yes, you can experiment with different flours like almond or coconut, but bear in mind that this may alter the texture and flavor. You’ll need to adjust the amounts accordingly.
Why did my cookies spread too much during baking?
Excess spreading can occur if the butter is too warm or if the dough isn’t chilled before baking. Ensure your butter is softened, not melted, and try chilling the dough for 30 minutes before baking.
How can I tell if my cookies are underbaked?
Underbaked cookies will appear glossy in the center and will not hold their shape. They should be set on the edges but slightly soft in the middle for the best texture.
What can I add to enhance the flavor profile of my dough?
Incorporating spices such as cinnamon or espresso powder can deepen the flavor of your chocolate dough without overpowering it. A pinch of peppermint extract can also offer a refreshing twist.
Conclusion
Chocolate thumbprint cookies are a delightful addition to any dessert repertoire, appealing to both the taste buds and the imagination. With every bite, the soft chocolate cookie melts in your mouth, complemented by the rich filling that you’ve chosen.
These cookies not only allow for creativity in flavors and fillings but also become a cherished recipe that can be passed down through generations. Enjoy baking and sharing them with friends and family for a truly memorable experience.
Recipe Card
Delightful Chocolate Thumbprint Cookies for All Occasions
Ingredients
- 1 cup unsalted butter softened
- 1 cup granulated sugar
- 2 large eggs
- 2 teaspoons vanilla extract
- 2 cups all-purpose flour
- 1/2 cup unsweetened cocoa powder
- 1/4 teaspoon salt
- 1 cup chocolate ganache or fruit preserves
Instructions
- Preheat the oven to 350°F (175°C).
- In a large bowl, cream together the softened butter and sugar until light and fluffy.
- Add the eggs, one at a time, mixing well after each addition. Stir in the vanilla extract.
- In another bowl, whisk together the flour, cocoa powder, and salt.
- Gradually add the dry ingredients to the wet ingredients, mixing until combined.
- Scoop out tablespoon-sized portions of dough and roll them into balls. Place them on a baking sheet lined with parchment paper.
- Use your thumb or the back of a spoon to create an indentation in the center of each cookie.
- Bake the cookies for 10–12 minutes, or until the edges are set but the centers are soft.
- Remove from the oven and let the cookies cool on the baking sheet for 5 minutes before transferring them to a wire rack.
- Once cooled, fill each thumbprint indentation with chocolate ganache or fruit preserves.
Notes
Additional serving suggestions: pair with a crisp salad, garlic bread, or roasted seasonal vegetables for balance.
For make-ahead, prep components separately and assemble just before heating to preserve texture.
Taste and adjust with acid (lemon/vinegar) and salt right at the end to wake up flavors.