Introduction
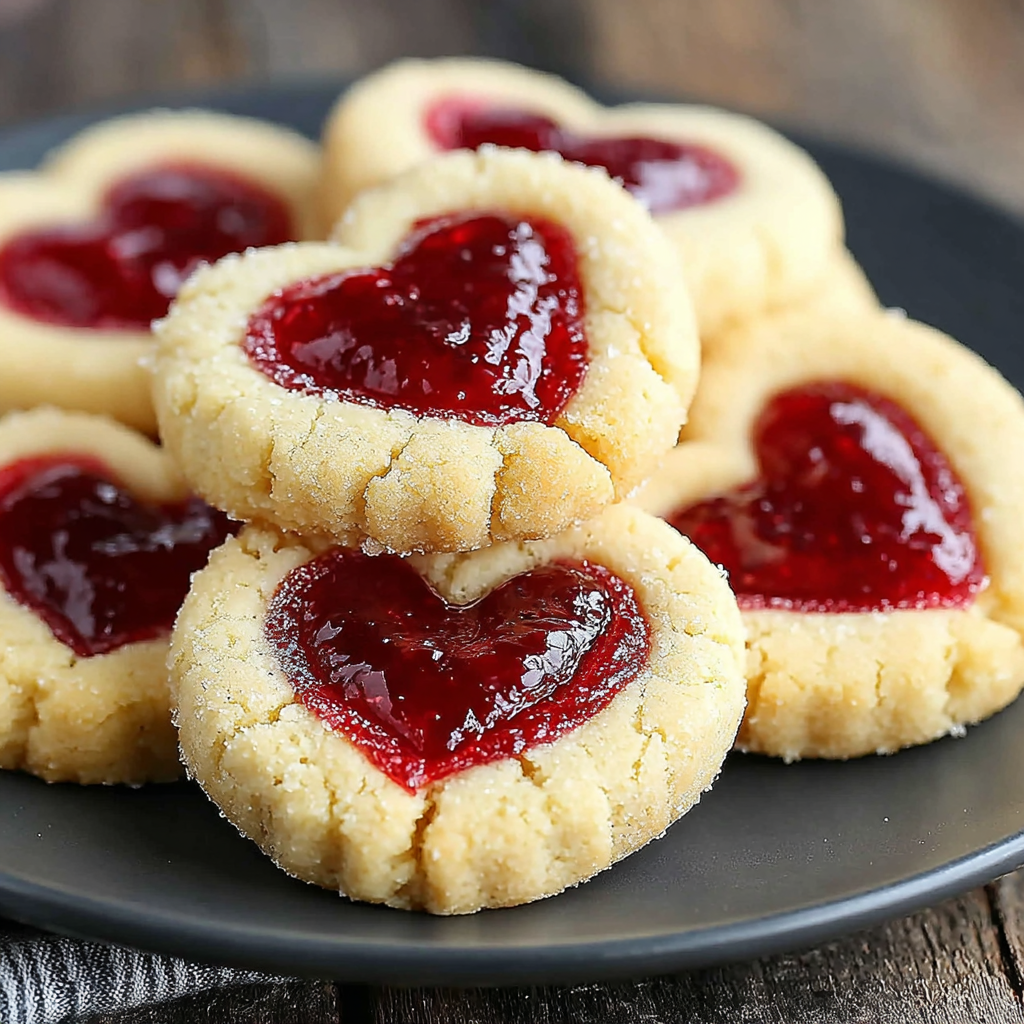
Heart Jam Thumbprint Cookies embody the spirit of love and creativity in baking. Their charming shape and delectable flavors make them perfect for sharing with friends and family, especially during festive gatherings.
The beauty of these cookies lies not only in their aesthetic appeal but also in their delicious contrast between buttery dough and sweet, fruity jam. They are surprisingly easy to make, allowing even novice bakers to create a treat that looks elegant and tastes delightful.
As you prepare these cookies, you'll find joy in the process and the satisfaction of serving a homemade creation that has charm and flavor. Whether for Valentine's Day or a simple afternoon snack, these cookies will surely bring smiles all around.
Ingredients
- 1 cup unsalted butter, softened
Unsalted butter provides richness and depth of flavor to the cookies. It contributes to a tender crumb and allows the sweetness of the jam to shine through without being overly salty. - 1/2 cup granulated sugar
Granulated sugar sweetens the dough and helps create a pleasing texture. It's essential for achieving that classic cookie sweetness and light crispness in the final baked product. - 1/2 cup confectioners' sugar
Confectioners' sugar adds a delicate sweetness and contributes to the smooth texture of the dough. It also helps in achieving a light and tender finished cookie. - 1 teaspoon vanilla extract
Vanilla extract enhances the overall flavor of the cookies, adding a warm and inviting aroma that elevates the taste. It's a key element in creating a well-rounded flavor profile. - 2 cups all-purpose flour
All-purpose flour provides structure and stability to the cookies. It plays a crucial role in forming the dough and achieving the desired consistency for thumbprints. - 1/4 teaspoon salt
A pinch of salt balances the sweetness of the cookies, enhancing the overall flavor. Salt is critical in baking, as it helps to bring out the other flavors in the ingredients. - 3/4 cup fruit jam or preserves (any flavor)
The jam or preserves fill the thumbprint, adding flavor, moisture, and a pop of color. The type of jam used can easily vary the taste of the cookies, making them customizable.
Directions & Preparation
Step 1: Preheat the oven to 350°F (175°C) and line two baking sheets with parchment paper.
Preheating the oven ensures even baking from the start, which is vital for the perfect texture. Lining the sheets with parchment paper prevents the cookies from sticking and promotes even browning.
Step 2: In a large mixing bowl, cream together the softened butter, granulated sugar, and confectioners' sugar until light and fluffy.
Creaming the butter and sugars aerates the mixture, creating a light and fluffy base. This texture is crucial as it helps to incorporate air, leading to a more tender cookie as they bake.
Step 3: Add the vanilla extract and mix until combined, followed by the flour and salt.
Incorporating the vanilla adds depth of flavor, while adding flour and salt provides the essential structure of the cookies. Mix gently to avoid overworking the dough, which can lead to tough cookies.
Step 4: Form the dough into small balls, about 1 inch in diameter, and place them on the prepared baking sheets.
Shaping the balls evenly ensures that the cookies bake uniformly. Spacing them out also allows for spreading during baking, so they don’t meld into one another.
Step 5: Using your thumb or the back of a spoon, create an indentation in the center of each cookie ball.
Creating the thumbprint is essential for holding the jam. Be gentle to avoid cracking the dough, ensuring a neat indentation that can hold its shape while baking.
Step 6: Fill each indentation with your chosen jam, about three-quarters full.
Filling the thumbprints with jam allows the cookies to retain moisture during baking, creating a shiny, flavorful center. Be careful not to overfill, as the jam may spill over while baking.
Step 7: Bake in the preheated oven for 12-15 minutes, or until the edges are lightly golden.
Baking until golden brown indicates that the cookies are done. This step is crucial as it ensures they will hold their shape and have a pleasing texture, while the jam bubbles slightly in the center.
Step 8: Let the cookies cool on the baking sheets for 5 minutes, then transfer them to a wire rack to cool completely.
Cooling them briefly on the sheets allows them to firm up, but transferring to a wire rack prevents them from steaming and getting soggy. Proper cooling helps maintain the perfect texture.

Exploring Flavor Variations for Your Cookies
While traditional fruit jams like raspberry or strawberry are popular, don’t hesitate to explore different flavors. Consider using citrus jams for a zesty twist or even chocolate spreads for a decadent surprise. Each variation adds its own character to the cookies, making them a fun treat for any palate.
Perfecting the Thumbprint Technique
The key to achieving a well-defined thumbprint lies in the pressure applied. If using your thumb, wet it slightly to prevent sticking, or use the back of a spoon for a uniform indent. This not only improves aesthetics but also ensures that the jam has a proper space to fill during baking.
Presentation Tips for Festive Occasions
To elevate the presentation of your Heart Jam Thumbprint Cookies, consider dusting them with powdered sugar before serving. Arranging them on a decorative platter with fresh mint or edible flowers can transform a casual treat into a stunning centerpiece for celebrations or gatherings.
FAQs
What can I do if my dough is too thick?
If the dough feels overly thick and crumbly, try adding a tablespoon of milk or water gradually until it reaches a workable consistency. This can help bind the ingredients without affecting the overall flavor.
How can I make cookies slightly less sweet?
To reduce the sweetness, consider decreasing the amount of granulated sugar by a couple of tablespoons. Alternatively, you can use a combination of sweet and tart jams to balance the flavors.
What if the jam spills during baking?
If the jam spills over, it’s usually due to overfilling the thumbprint. Make sure to fill each indentation only about three-quarters full next time to prevent this from happening.
Can I use store-bought cookie dough for thumbprints?
Yes, you can use store-bought cookie dough to save time, but remember that part of the charm of thumbprint cookies is the homemade touch. If using store-bought, just make sure to create the indents before baking.
What should I do if I want to incorporate nuts into the cookies?
If you'd like to add nuts, finely chop them and fold them into the dough before shaping. Just be sure to adjust the overall amount of flour slightly to maintain the right consistency.
How can I tell if my cookies are overcooked?
Overcooked cookies will appear darker than intended and may have a hard texture, rather than the soft centers that thumbprints should have. Keep an eye on them during the last few minutes of baking.
Conclusion
Heart Jam Thumbprint Cookies are a delightful way to celebrate baking and share love with others. Whether served at tea time or as a special dessert, they represent both fun and flavor in each bite.
By experimenting with different jams and adapting the recipe to suit your taste, you can create a unique treat for any occasion. Embrace the joy of making these cookies, and let your creativity shine through.
Recipe Card

Delightful Chocolate Covered Strawberries for Two
Ingredients
- 1 pound fresh strawberries
- 8 ounces chocolate dark, milk, or white
- 1 tablespoon coconut oil
- Optional toppings sprinkles, crushed nuts, sea salt
Instructions
- Wash and dry strawberries thoroughly.
- Melt the chocolate with coconut oil.
- Dip strawberries into melted chocolate.
- Add toppings if desired.
- Chill to set the chocolate.
- Serve and enjoy your creations.
Notes
Additional serving suggestions: pair with a crisp salad, garlic bread, or roasted seasonal vegetables for balance.
For make-ahead, prep components separately and assemble just before heating to preserve texture.
Taste and adjust with acid (lemon/vinegar) and salt right at the end to wake up flavors.