Introduction
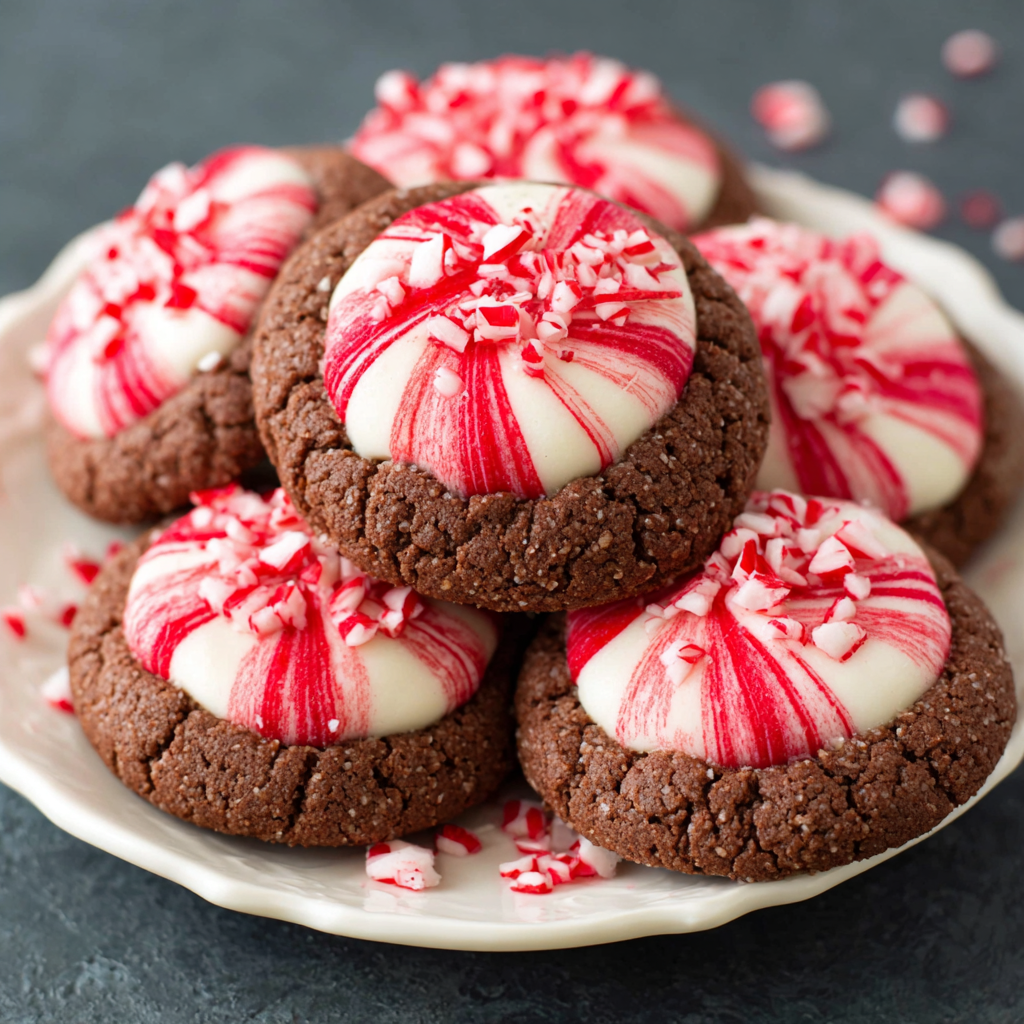
The holiday season is not complete without the comforting aroma of freshly baked cookies wafting through your home. One delightful treat that captures the spirit of the season is Peppermint Chocolate Blossom Cookies. Combining rich chocolate flavor with a refreshing touch of peppermint, these cookies are sure to please everyone at your gathering.
Easy to make and visually appealing, they feature a delightful chocolate base topped with a signature peppermint kiss. The contrast of the soft chewy cookie with the melt-in-your-mouth chocolate centerpiece creates a unique cookie experience that’s hard to resist. Perfect for sharing or simply indulging in, these cookies can become a tradition in your household.
Ingredients
- 1 cup unsalted butter, softened
Butter acts as the base fat in the cookie dough, contributing to its rich flavor and tender texture. Softened butter allows for better incorporation of the sugar, leading to a lighter cookie. - 1 cup granulated sugar
Sugar sweetens the cookie and helps achieve a pleasingly chewy texture. It also aids in browning the cookies during baking, adding a hint of caramelization. - 1 cup packed brown sugar
Brown sugar adds moisture and a rich depth of flavor to the cookies, thanks to its molasses content. It helps create a softer and chewier cookie than granulated sugar alone. - 2 large eggs
Eggs provide structure and stability to the cookie dough while also adding moisture. They contribute to the leavening process for a perfect rise. - 2 teaspoons pure vanilla extract
Vanilla extract enhances the overall flavor profile of the cookies. It adds an aromatic note that balances nicely with both chocolate and peppermint. - 2 ½ cups all-purpose flour
Flour is the primary structure-building ingredient, giving the cookies their shape and texture. The right amount is crucial to prevent overly crumbly or dense cookies. - ¾ cup unsweetened cocoa powder
Cocoa powder brings the rich chocolate essence to the cookies, making them deeply flavorful. It also helps in achieving a dark, appealing color. - 1 teaspoon baking soda
Baking soda acts as a leavening agent, introducing air into the dough and helping the cookies rise while baking. It also enhances the dark color of the cocoa. - 1 teaspoon salt
Salt is essential for balancing the sweetness and enhancing the flavors of the other ingredients. It rounds out the taste of the cookies. - 1 cup peppermint baking chips or crushed candy canes
Peppermint adds a refreshing flavor that cuts through the richness of the chocolate. The peppermint chips also provide a delightful texture contrast. - 24 chocolate peppermint kisses, unwrapped
These serve as the cookie's signature topping. When pressed into the warm cookies, they melt slightly, creating a decadent finish that ties the flavors together.
Directions & Preparation
Step 1: Preheat your oven to 350°F (175°C).
Preheating your oven ensures that your cookies bake evenly and at the correct temperature from the moment they go in. This step is crucial to achieve that perfect texture that is soft in the center and slightly crisp around the edges.
Step 2: In a large mixing bowl, cream together the softened butter, granulated sugar, and brown sugar until light and fluffy.
Creaming the butter and sugars aerates the mixture, incorporating air that will help lighten the cookies. Aim for a pale, fluffy consistency to ensure a tender cookie.
Step 3: Add the eggs one at a time, mixing well after each addition, and then stir in the vanilla extract.
Incorporating the eggs properly maintains the emulsion, which is essential for the right texture. This step also allows the vanilla to infuse throughout the mixture, enriching the cookie flavor.
Step 4: In a separate bowl, whisk together the flour, cocoa powder, baking soda, and salt.
Sifting or whisking the dry ingredients helps prevent clumps and ensures even distribution of the cocoa and leavening agents. This is key for uniform cookies.
Step 5: Gradually add the dry ingredients to the wet ingredients, mixing until just combined.
Overmixing at this stage can lead to tough cookies. Stir until you no longer see dry flour; your dough should be slightly sticky and cohesive.
Step 6: Fold in the peppermint baking chips or crushed candy canes.
This is where you can consider your peppermint flavor level. Folding them in carefully retains the airiness of the dough while evenly dispersing the peppermint bits throughout.
Step 7: Scoop tablespoon-sized balls of dough and place them on a baking sheet lined with parchment paper, spacing them about 2 inches apart.
Spacing is crucial as cookies expand while baking. Additionally, parchment prevents sticking and promotes even baking, ensuring a crisp edge.
Step 8: Bake in the preheated oven for 10-12 minutes, or until the edges are set but the centers are still soft.
Baking time is essential for achieving the perfect texture. Underbaking slightly will yield a chewy center while baking too long could lead to a dry cookie.
Step 9: Remove the cookies from the oven and immediately press a chocolate peppermint kiss into the center of each cookie.
This step is vital for creating the signature look and flavor. The warmth of the cookie will gently melt the kiss, melding the flavors as they cool.
Step 10: Let the cookies cool on the baking sheet for 5 minutes before transferring them to a wire rack to cool completely.
Cooling on the sheet allows the cookies to firm up slightly and makes them easier to move without breaking. Transfer them to a wire rack for air circulation, which helps prevent sogginess.

Perfecting the Texture with Temperature
Achieving the right texture for peppermint chocolate blossom cookies starts with using butter at room temperature. Too soft or too hard butter leads to undesirable cookie texture. Ensuring your eggs are also at room temperature helps integrate them better into the batter, avoiding unwanted lumps. Keep in mind, the soft dough will firm up while baking, so avoid chilling the dough before shaping.
The Role of Peppermint in Flavor Balance
Peppermint not only adds refreshing zest but it also undoes the richness from the chocolate and butter in these cookies. Using peppermint baking chips delivers an even distribution throughout, while crushed candy canes provide texture and visual appeal. Whether you prefer a gentle hint of peppermint or a stronger flavor, you can easily adjust the amount to fit your taste preference.
Creative Variations for the Seasonal Spirit
While peppermint chocolate blossom cookies are delightful on their own, consider adding festive touches—like swapping out the kisses for dark chocolate or using white chocolate for a different flavor profile. You can also incorporate festive sprinkles atop the chocolate after it has melted for extra color. Each of these variations adds a unique twist to the classic recipe, making it even more special for celebrations.
FAQs
What should I do if my cookie dough is too thick?
If the cookie dough is too thick, you can add a teaspoon of milk or water gradually until you achieve a texture that is workable but not overly sticky.
Can I use different varieties of chocolate kisses for this recipe?
Absolutely! While peppermint kisses are traditional, you can experiment with caramel, milk chocolate, or even dark chocolate kisses for a new flavor twist.
What can I do if my cookies spread too much while baking?
If the cookies spread excessively, it may be due to melted butter or overmixing the dough. Ensure your butter is softened but not melted, and mix just until combined.
Can I make these cookies smaller or larger?
Yes, you can adjust the size of the dough balls based on your preference. However, make sure to adjust the baking time accordingly, keeping a close eye on the cookies while they bake.
How do I know when the cookies are ready to take out?
The cookies are done when the edges are set and the centers still appear soft. They will continue to firm up as they cool.
What should I do if my cookies turn out bland?
Ensure you are using quality ingredients, especially the cocoa and peppermint. You may also enhance the flavor by adding a bit more vanilla extract or a pinch of espresso powder.
Conclusion
Peppermint chocolate blossom cookies perfectly encapsulate the joy and warmth of the holiday season. Their mix of flavors and textures makes them an irresistible addition to any festive table. Plus, they are straightforward enough for home bakers to create without fuss.
So gather your ingredients, bring some holiday cheer into your kitchen, and enjoy the process of baking these charming cookies. Whether for yourself or as a thoughtful gift, these treats are bound to spread happiness.
Recipe Card

Delightful Peppermint Chocolate Blossom Cookies
Ingredients
- 1 cup unsalted butter softened
- 1 cup granulated sugar
- 1 cup packed brown sugar
- 2 large eggs
- 2 teaspoons pure vanilla extract
- 2 ½ cups all-purpose flour
- ¾ cup unsweetened cocoa powder
- 1 teaspoon baking soda
- 1 teaspoon salt
- 1 cup peppermint baking chips or crushed candy canes
- 24 chocolate peppermint kisses unwrapped
Instructions
- Preheat your oven to 350°F (175°C).
- In a large mixing bowl, cream together the softened butter, granulated sugar, and brown sugar until light and fluffy.
- Add the eggs one at a time, mixing well after each addition, and then stir in the vanilla extract.
- In a separate bowl, whisk together the flour, cocoa powder, baking soda, and salt.
- Gradually add the dry ingredients to the wet ingredients, mixing until just combined.
- Fold in the peppermint baking chips or crushed candy canes.
- Scoop tablespoon-sized balls of dough and place them on a baking sheet lined with parchment paper, spacing them about 2 inches apart.
- Bake in the preheated oven for 10-12 minutes, or until the edges are set but the centers are still soft.
- Remove the cookies from the oven and immediately press a chocolate peppermint kiss into the center of each cookie.
- Let the cookies cool on the baking sheet for 5 minutes before transferring them to a wire rack to cool completely.
Notes
Additional serving suggestions: pair with a crisp salad, garlic bread, or roasted seasonal vegetables for balance.
For make-ahead, prep components separately and assemble just before heating to preserve texture.
Taste and adjust with acid (lemon/vinegar) and salt right at the end to wake up flavors.