Introduction
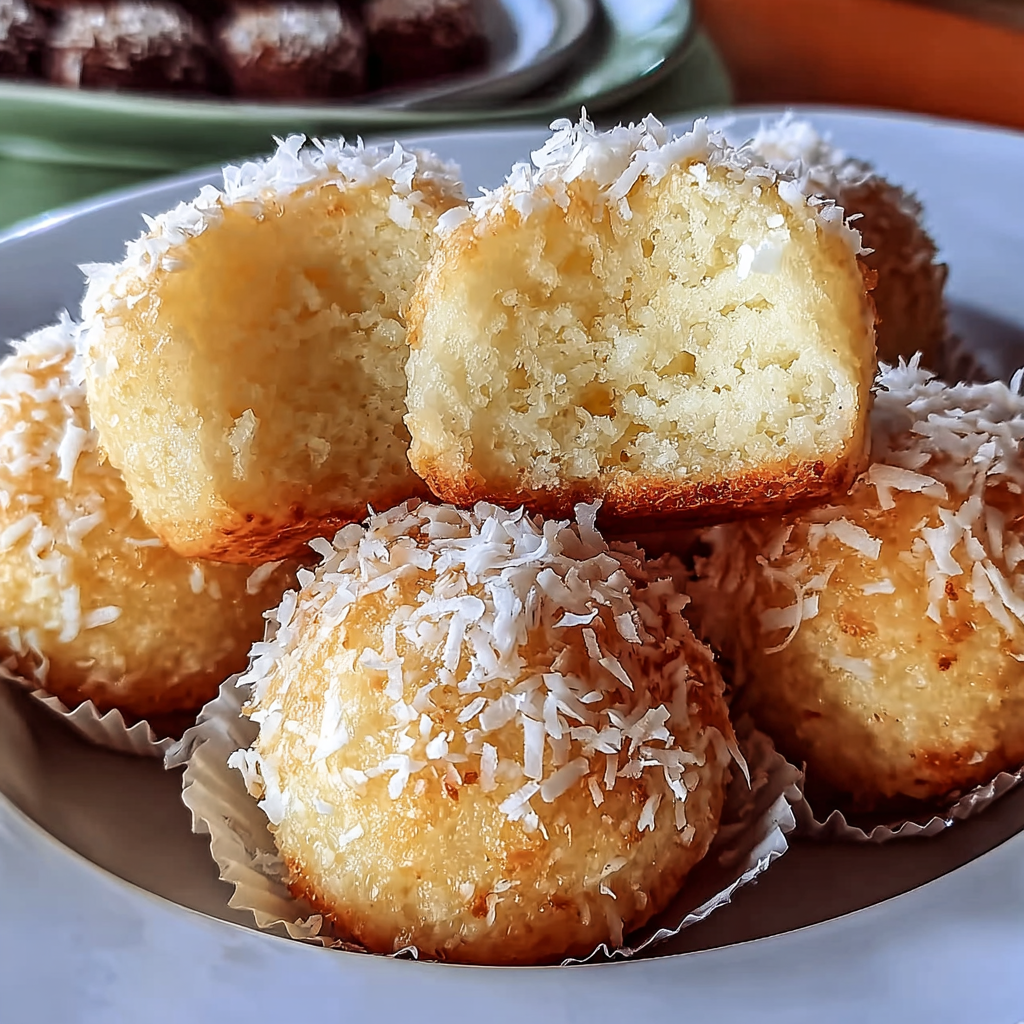
Portuguese coconut cakes, or 'Bolinho de Coco', are a cherished dessert that transcends mere confectionery to embody the soul of Portugal's coastal regions. With their tender, moist texture and a rich coconut flavor that harmonizes with sweetness, these treats evoke a sense of nostalgia and comfort among locals and visitors alike.
Crafting these cakes at home allows you the joy of bringing a piece of Portuguese heritage into your kitchen. Whether enjoyed with coffee or as a sweet treat for family gatherings, the layers of simplicity and flavor make these cakes a must-try for any home cook willing to explore the culinary traditions of Portugal.
Ingredients
- 1 cup shredded coconut
Shredded coconut adds both flavor and texture to the cakes, creating a delightful chewiness. It also contributes natural sweetness and moisture, essential for achieving the desired cake consistency. - 1 cup sugar
Sugar not only sweetens the cakes but also plays a crucial role in creating a tender crumb by enhancing the moisture retention of the batter during baking. - 3 large eggs
Eggs act as a binding agent, providing structure to the cakes. They also aid in moisture and richness, resulting in a soft and decadent final product. - 1/2 cup all-purpose flour
Flour provides structure and stability to the cakes while keeping them light and airy. It is crucial to use the appropriate amount to avoid overly dense or crumbly cakes. - 1 teaspoon baking powder
Baking powder acts as a leavening agent, helping the cakes to rise and giving them a light, fluffy texture that contrasts beautifully with the coconut. - 1/2 cup coconut milk
Coconut milk enhances the overall coconut flavor and richness of the cakes. Its creaminess helps to create a moist batter, contributing to the cakes' tender crumb. - 1/4 teaspoon salt
Salt boosts the overall flavor profile of the cakes, balancing the sweetness while enhancing the other flavors present in the mixture.
Directions & Preparation
Step 1: Preheat your oven to 350°F (175°C).
Preheating the oven is essential for ensuring that your cakes bake evenly. As the cakes enter the heated space, they will begin to rise appropriately, creating the desired fluffy texture.
Step 2: Prepare a baking pan by greasing it lightly with butter or non-stick spray.
Greasing the pan prevents the cakes from sticking, allowing for easy removal once baked. This is crucial for maintaining the integrity of the cakes and ensuring they don’t crumble.
Step 3: In a large mixing bowl, combine the shredded coconut, sugar, and eggs. Stir until well blended.
This step is vital for incorporating the ingredients evenly. The sugar begins to dissolve, while the eggs help bind everything together, creating a homogenous mixture that will form the base of your cakes.
Step 4: Add flour, baking powder, coconut milk, and salt to the mixture. Mix until just combined.
Mixing gently at this stage is important to avoid overworking the batter. Overmixing can lead to dense cakes, while a light hand will help keep them airy and tender.
Step 5: Scoop the batter into the prepared baking pan, filling each cup about three-quarters full.
Filling the cups appropriately allows for ideal rising during baking without overflowing. This also ensures an even cook, enabling each cake to achieve a beautifully golden-brown top.
Step 6: Bake in the preheated oven for 25-30 minutes or until a toothpick inserted in the center comes out clean.
The toothpick test is a reliable method to check for doneness. When the toothpick comes out clean, it indicates the cakes are finished; this also prevents overbaking, which can lead to dryness.
Step 7: Allow the cakes to cool in the pan for 10 minutes before transferring them to a wire rack to cool completely.
Cooling in the pan initially helps them firm up, making it easier to remove without breaking. Transferring them to a wire rack ensures even cooling and prevents sogginess on the bottom.
Step 8: Serve the cakes warm or at room temperature, dusted with powdered sugar if desired.
Serving at the right temperature enhances the flavors. A light dusting of powdered sugar adds an aesthetic touch while providing a hint of extra sweetness.

The Origins of Bolinho de Coco
These delightful coconut cakes have their roots in Portugal's rich baking traditions, often found in coastal towns where coconuts are plentiful. The recipe reflects a blend of local ingredients and influences from colonial times, where coconuts were prized for their versatility.
Perfect Pairings for Your Coconut Cakes
Bolinho de Coco pairs beautifully with a variety of beverages. A strong espresso enhances the cakes' sweetness, while tea provides a gentle contrast. For a festive touch, try serving them with a glass of Port wine to underline their rich coconut flavor.
Modifying the Recipe to Suit Your Taste
While the traditional recipe is delightful as is, feel free to get creative. Adding a hint of vanilla or almond extract can elevate the flavor, while incorporating chocolate chips or nuts adds texture. The beauty of these cakes lies in their adaptability.
FAQs
What if my coconut cakes are too dry?
If your cakes are dry, check the baking time; they might have been overbaked. Ensuring the right oven temperature and watching closely during the last few minutes is key.
Can I use sweetened coconut instead of unsweetened?
Yes, using sweetened coconut will increase the overall sweetness of the cakes. Adjust the sugar quantity in the recipe if you prefer a less sweet result.
What if my batter seems too thin?
If your batter is too thin, it could be due to the coconut milk. Consider gradually adding a bit more flour to achieve a thicker consistency as desired.
How can I make these coconut cakes more flavorful?
You can enhance the flavor by adding spices like nutmeg or cinnamon, or by using flavored extracts such as vanilla or coconut.
Can I substitute some of the flour with coconut flour?
Yes, you can blend in coconut flour, but it absorbs more moisture. Adjust the liquid components accordingly to achieve the right batter consistency.
What should I do if my cakes don't rise properly?
If your cakes don’t rise, double-check your baking powder’s freshness. Also, be careful not to overmix the batter, as this can inhibit proper rising.
Conclusion
Baking Heavenly Portuguese Coconut Cakes brings the warmth of tradition into your home. Each bite evokes a feeling of satisfaction and nostalgia, showcasing the beauty of simple ingredients in a harmonious blend.
Whether you’re sharing them with loved ones or indulging in a quiet moment for yourself, these cakes invite joy and comfort. Embrace the delightful experience of crafting these treats, and let their sweet aroma fill your kitchen.
Recipe Card

Discovering the Delights of Portuguese Coconut Cakes
Ingredients
- 1 cup shredded coconut
- 1 cup sugar
- 3 large eggs
- 1/2 cup all-purpose flour
- 1 teaspoon baking powder
- 1/2 cup coconut milk
- 1/4 teaspoon salt
Instructions
- Preheat your oven to 350°F (175°C).
- Prepare a baking pan by greasing it lightly with butter or non-stick spray.
- In a large mixing bowl, combine the shredded coconut, sugar, and eggs. Stir until well blended.
- Add flour, baking powder, coconut milk, and salt to the mixture. Mix until just combined.
- Scoop the batter into the prepared baking pan, filling each cup about three-quarters full.
- Bake in the preheated oven for 25-30 minutes or until a toothpick inserted in the center comes out clean.
- Allow the cakes to cool in the pan for 10 minutes before transferring them to a wire rack to cool completely.
- Serve the cakes warm or at room temperature, dusted with powdered sugar if desired.
Notes
Additional serving suggestions: pair with a crisp salad, garlic bread, or roasted seasonal vegetables for balance.
For make-ahead, prep components separately and assemble just before heating to preserve texture.
Taste and adjust with acid (lemon/vinegar) and salt right at the end to wake up flavors.