Introduction
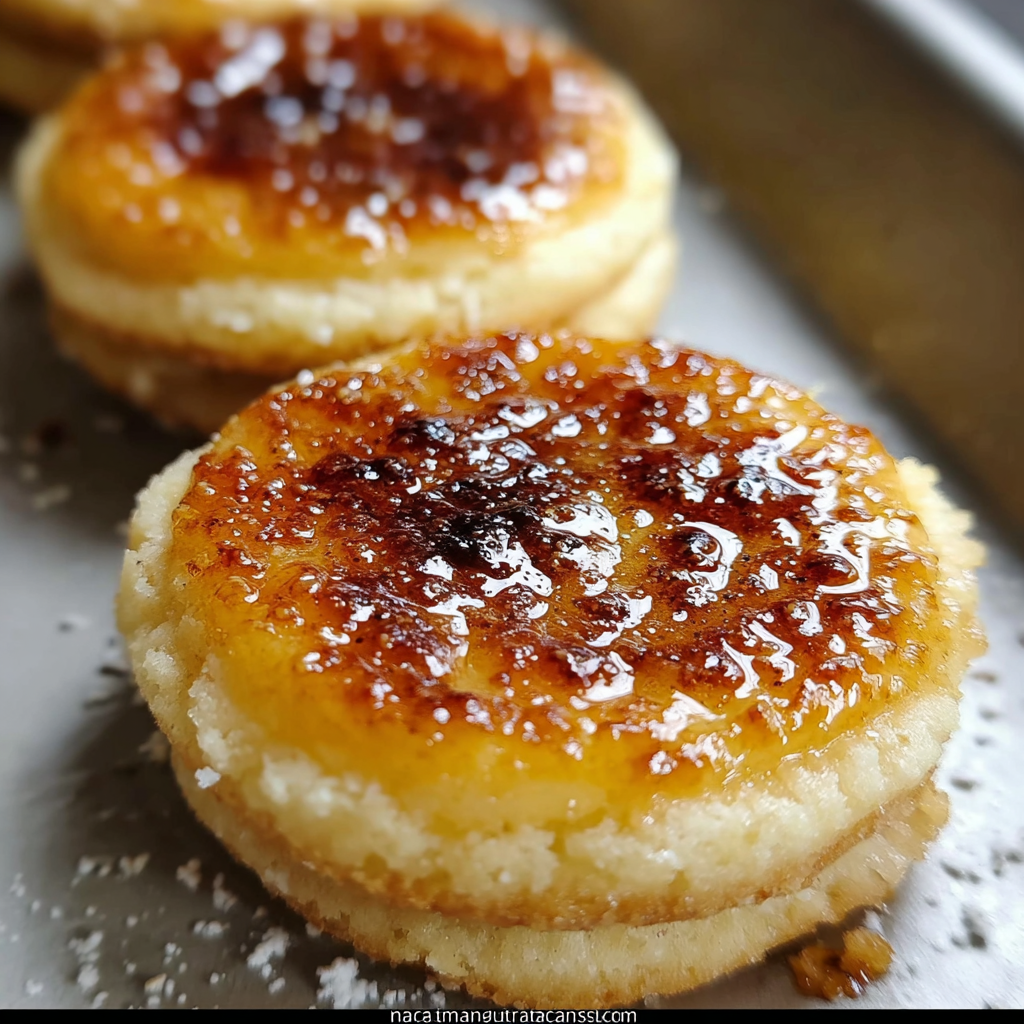
Crème brûlée cookies are a delightful twist on the classic French dessert, seamlessly blending the rich flavors of vanilla custard and the satisfying crunch of caramelized sugar into a cookie format. Imagine biting into a soft, buttery cookie that captures the essence of crème brûlée—the creamy custard with its hint of vanilla and a caramelized crust.
These cookies are perfect for any occasion, whether it’s a cozy evening at home or a gathering with friends. With a few simple ingredients and some basic baking techniques, you can create a batch that will impress anyone who takes a bite.
Ingredients

- 1 cup unsalted butter, softened
Unsalted butter adds richness and moisture to the cookies, helping to create a tender texture. The butter’s fat content contributes to the cookie’s overall flavor while allowing for a perfect balance with the sugar. - 1 cup granulated sugar
Granulated sugar sweetens the cookies and aids in achieving a light, airy texture. The sugar also plays a crucial role in creating that signature caramelized top when you finish the cookies. - 1/2 cup packed light brown sugar
Brown sugar provides depth of flavor with its molasses content, enhancing the cookies’ overall taste. It also helps retain moisture, resulting in chewy centers. - 2 large eggs
Eggs are essential for binding the ingredients together and providing structure to the cookies. They also help in leavening, ensuring that the cookies rise perfectly while baking. - 2 teaspoons vanilla extract
Vanilla extract adds warmth and a distinct flavor that embodies the essence of crème brûlée. It enhances the sweetness and complements the richness of the butter. - 2 cups all-purpose flour
Flour is the backbone of cookie dough, providing structure. The right amount of flour will ensure the cookies have the perfect balance of chewy and crumbly textures. - 1 teaspoon baking powder
Baking powder is a leavening agent that helps the cookies rise, promoting a soft and tender texture. It ensures the cookies have volume and a delightful crumb. - 1/4 teaspoon salt
Salt balances the sweetness of the cookies, enhancing the overall flavor. A little salt also helps to highlight the vanilla and caramel notes in the final product. - 1/4 cup granulated sugar (for topping)
This extra sugar is the key to achieving the signature brûléed finish. When caramelized, it creates a satisfying crunch on top of the soft cookie, a delightful contrast that mimics the classic dessert.
Directions & Preparation
Step 1: Preheat your oven to 350°F (175°C).
Preheating the oven is crucial as it ensures that the cookies will bake evenly. Starting with a hot oven helps the cookies to rise properly and develop a beautiful golden color.
Step 2: In a large mixing bowl, cream together the softened butter, granulated sugar, and brown sugar until light and fluffy.
Creaming the butter with the sugars incorporates air into the mixture, which is essential for creating a light, airy texture. This step also helps to dissolve the sugars, leading to a smoother cookie dough.
Step 3: Add in the eggs one at a time, mixing well after each addition, followed by the vanilla extract.
Incorporating the eggs individually allows for better emulsification of the mixture. This ensures that the cookies will have a uniform texture and aids in achieving the desired moisture.
Step 4: In a separate bowl, whisk together the flour, baking powder, and salt.
Whisking the dry ingredients together helps to distribute the leavening agent evenly throughout the flour. This ensures that each cookie will rise uniformly, avoiding any dense patches.
Step 5: Gradually add the dry mixture to the wet mixture, mixing just until combined.
Overmixing at this stage can lead to tough cookies as it develops gluten in the flour. It’s important to mix until just combined to maintain a tender texture.
Step 6: Scoop tablespoons of dough onto a lined baking sheet, leaving enough space between each cookie.
Spacing the cookies adequately allows for even baking as they spread out during the baking process. This prevents them from merging and ensures that each cookie retains its shape.
Step 7: Bake in the preheated oven for 10-12 minutes, until the edges are golden but the centers remain soft.
Baking until the edges are golden while keeping the centers soft guarantees a perfect texture. Remove them from the oven just as they begin to set for a chewy interior.
Step 8: Remove the cookies from the oven and let them cool for a few minutes before transferring them to a wire rack.
Allowing the cookies to cool on the baking sheet for a bit helps them firm up without becoming overbaked. A wire rack allows for proper air circulation, preventing sogginess.
Step 9: Sprinkle granulated sugar on top of each cookie and use a kitchen torch to caramelize the sugar until it is golden brown.
The caramelization of sugar creates that iconic burnt-sugar flavor and satisfying crunch. Move the torch continuously to prevent burning any particular area.
Step 10: Let the cookies cool slightly before serving.
Cooling the cookies slightly allows the caramelized sugar to firm up, making them easier to handle. This brief wait heightens the anticipation of enjoying the versatile flavor of crème brûlée.
The Magic of Caramelization
Caramelization is the process that transforms sugar into a beautiful, golden crust. When you torch the granulated sugar on top of these cookies, you’re not just adding a visual appeal—you’re enhancing the flavor profile, bringing in a rich, complex sweetness that perfectly complements the buttery cookie base.
A Hint of Vanilla Bliss
At the heart of crème brûlée cookies lies the enchanting essence of vanilla. The addition of pure vanilla extract elevates the cookie, infusing it with a warm and inviting aroma. This touch of vanilla resonates throughout the entire cookie, capturing the creamy character of the classic dessert.
Texture: The Key to Success
The ideal crème brûlée cookie strikes a balance between soft and crunchy textures. The exterior’s caramelized sugar provides a delightful contrast to the chewy interior, reminiscent of crème brûlée’s silky custard. Perfecting this balance creates a cookie experience that is not just a treat but a delicious memory.
FAQs
What if I don’t have a kitchen torch for caramelizing?
If you lack a kitchen torch, you can caramelize the sugar under a broiler. Place the cookies on a baking sheet, sprinkle sugar on top, and watch closely as it melts and bubbles, taking care not to burn them.
Can I make the dough in advance?
Yes, you can prepare the cookie dough ahead of time. Shape it into balls and store them in the refrigerator for up to 3 days, or freeze for longer, baking them straight from the freezer when you’re ready.
What if my cookies spread too much while baking?
If cookies spread excessively, they may have had too much butter or not enough flour. Adjust your ratios next time—consider refrigerating the dough for about 30 minutes before scooping to help manage spread.
Can I use dark brown sugar instead of light?
Certainly! Dark brown sugar will add a deeper, more complex flavor to your cookies due to its higher molasses content, enhancing the overall richness.
Why are my cookies too dry?
Over-baking can lead to dry cookies. Keep an eye on them in the oven and remove them when they are just beginning to set; they will continue to firm up while cooling.
What adjustments should I make for high-altitude baking?
At high altitudes, reduce the baking powder slightly and increase the flour. This prevents excessive spreading and helps maintain the cookie’s shape during baking.
Conclusion
Crème brûlée cookies encapsulate the decadence of a beloved dessert in every bite, showcasing the rich flavors of vanilla and caramel that make crème brûlée a classic. Baking these cookies allows you to bring a unique twist to your cookie jar, offering a delightful surprise for family and friends.
The combination of creamy and crunchy textures creates an unforgettable cookie experience. Don’t hesitate to share, but remember: they might just become your new favorite treat to enjoy alone!
Recipe Card

Indulge in Decadence with Crème Brûlée Cookies
Ingredients
- 1 cup unsalted butter softened
- 1 cup granulated sugar
- 1/2 cup packed light brown sugar
- 2 large eggs
- 2 teaspoons vanilla extract
- 2 cups all-purpose flour
- 1 teaspoon baking powder
- 1/4 teaspoon salt
- 1/4 cup granulated sugar for topping
Instructions
- Preheat your oven to 350°F (175°C).
- In a large mixing bowl, cream together the softened butter, granulated sugar, and brown sugar until light and fluffy.
- Add in the eggs one at a time, mixing well after each addition, followed by the vanilla extract.
- In a separate bowl, whisk together the flour, baking powder, and salt.
- Gradually add the dry mixture to the wet mixture, mixing just until combined.
- Scoop tablespoons of dough onto a lined baking sheet, leaving enough space between each cookie.
- Bake in the preheated oven for 10-12 minutes, until the edges are golden but the centers remain soft.
- Remove the cookies from the oven and let them cool for a few minutes before transferring them to a wire rack.
- Sprinkle granulated sugar on top of each cookie and use a kitchen torch to caramelize the sugar until it is golden brown.
- Let the cookies cool slightly before serving.
Notes
Additional serving suggestions: pair with a crisp salad, garlic bread, or roasted seasonal vegetables for balance.
For make-ahead, prep components separately and assemble just before heating to preserve texture.
Taste and adjust with acid (lemon/vinegar) and salt right at the end to wake up flavors.