Introduction
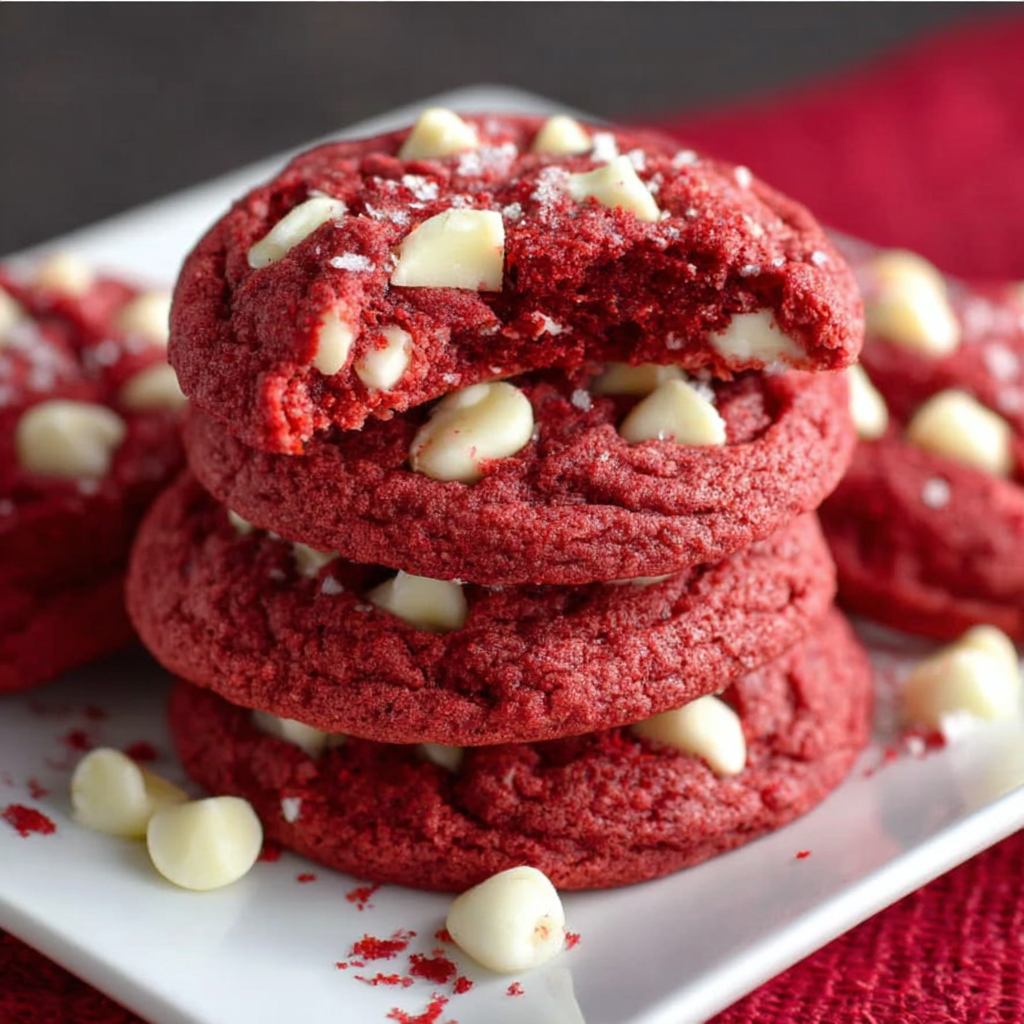
Red velvet isn't just a cake; it transforms into a cookie with a delightful twist. With their vibrant color and rich flavor, red velvet pan-banging cookies are a fabulous way to add a little fun to your baking repertoire. The concept of pan-banging cookies creates a crispy edge while keeping the center chewy, resulting in a texture combination that's hard to resist.
Imagine pulling a batch from the oven, gifts of vibrant red nestled amidst a cloud of white cream cheese frosting. These cookies don’t just look the part; they’re packed with flavor. From the slight hint of cocoa to the creamy tang of the frosting, every bite is a celebration of this classic dessert. Let’s explore how you can bring this delightful treat into your kitchen.
Ingredients
- 2 cups all-purpose flour
All-purpose flour gives structure to cookies, allowing them to hold shape while also providing a tender texture. The gluten development from this flour contributes to the delicious chewiness of the final cookie. - 1/2 cup unsweetened cocoa powder
Cocoa powder is essential for imparting that signature red velvet flavor and color. It adds depth and a slight bitterness that balances the sweetness of the sugars and frosting. - 1 teaspoon baking soda
Baking soda is a leavening agent that helps the cookies rise and develop a light texture. It reacts with the acidic ingredients to create carbon dioxide, giving the cookies their airy quality. - 1/2 teaspoon salt
Salt enhances all the flavors in your cookies, bringing out sweetness and balancing other flavors. It also strengthens gluten and improves the overall texture. - 1/2 cup unsalted butter, softened
Butter adds richness and flavor to the cookies, and when softened, it cream more easily with the sugars, allowing for a smooth texture. - 1 cup granulated sugar
Granulated sugar sweetens the cookies and contributes to their structure. It caramelizes during baking, giving the cookies a slight crispness on the outside. - 1/2 cup packed light brown sugar
Brown sugar adds moisture and a deeper flavor due to its molasses content. It helps achieve a chewy texture and enhances the overall sweetness. - 1 large egg
Eggs provide moisture and binding, helping to hold the cookie dough together while also contributing to its richness. - 1 teaspoon vanilla extract
Vanilla extract adds aromatic sweetness, enhancing the flavor profile of the cookies and complementing the cocoa and cream cheese. - 1 tablespoon red food coloring
This ingredient is crucial for achieving that beloved red hue of red velvet desserts. It intensifies the visual appeal and connects with traditional red velvet flavors. - 1/2 cup cream cheese, softened
Cream cheese provides a tangy flavor that pairs perfectly with the sweetness of the cookie and plays a crucial role in the frosting for a delightful contrast. - 1 cup powdered sugar
Powdered sugar is used for the frosting, adding sweetness and creating a smooth texture that complements the cookies without overpowering them.
Directions & Preparation
Step 1: Preheat your oven to 350°F (175°C).
Preheating the oven ensures that the cookies bake evenly and helps achieve the desired crispiness on the edges while keeping the center chewy. This crucial step allows the baking soda to activate properly as soon as the dough hits the hot surface.
Step 2: In a large bowl, whisk together the flour, cocoa powder, baking soda, and salt.
Whisking the dry ingredients together helps distribute the baking soda and salt evenly throughout the flour. This ensures that the cookies rise properly and taste balanced, avoiding pockets of overly salty or bland flavor.
Step 3: In another large bowl, beat the softened butter, granulated sugar, and brown sugar until creamy.
Creaming butter and sugars is essential for incorporating air into the mixture, which leads to a lighter cookie. The result should be a fluffy texture that adds lift during baking and contributes to the cookies’ delightful chewiness.
Step 4: Add in the egg, vanilla, and red food coloring, mixing until combined.
Incorporating the egg and liquid ingredients into the butter and sugar mix adds moisture and helps bind the dough together. The food coloring should be mixed in thoroughly to ensure even distribution of the red hue throughout the batter.
Step 5: Gradually add the dry ingredients to the wet mixture, mixing until just combined.
Mixing the dry ingredients into the wet ones slowly prevents overmixing, which can lead to dense cookies. The dough should come together without streaks of flour remaining, indicating everything is evenly combined.
Step 6: Scoop the dough onto a lined baking sheet, spacing each cookie about 2 inches apart.
Using a scoop helps ensure equal-sized cookies for uniform baking. Spacing them adequately allows room for the cookies to spread as they bake, preventing them from merging into each other.
Step 7: Bang the baking sheet against the counter right after placing the cookies in the oven.
This step is crucial for developing the characteristic pan-banging cookie edges. The shock from banging the tray helps create those lovely craggy surfaces, giving each cookie its unique look and texture.
Step 8: Bake for 10-12 minutes, until the edges are set but the centers remain soft.
Baking just until the edges firm up ensures you maintain a chewy center. The cookies will continue to cook slightly even after being removed from the oven due to residual heat, avoiding overbaking.
Step 9: Allow the cookies to cool on the baking sheet for 5 minutes before transferring to a wire rack.
Cooling on the baking sheet allows the cookies to firm up slightly, making them easier to transfer without breaking. This rest time also enhances their flavor as they continue to develop while cooling.
Step 10: While the cookies cool, prepare the cream cheese frosting by beating the cream cheese and powdered sugar until smooth and creamy.
Creating a smooth frosting is key for easy spreading atop each cookie. Properly beaten frosting adheres well to the cookies, ensuring a satisfying texture contrast when enjoyed.
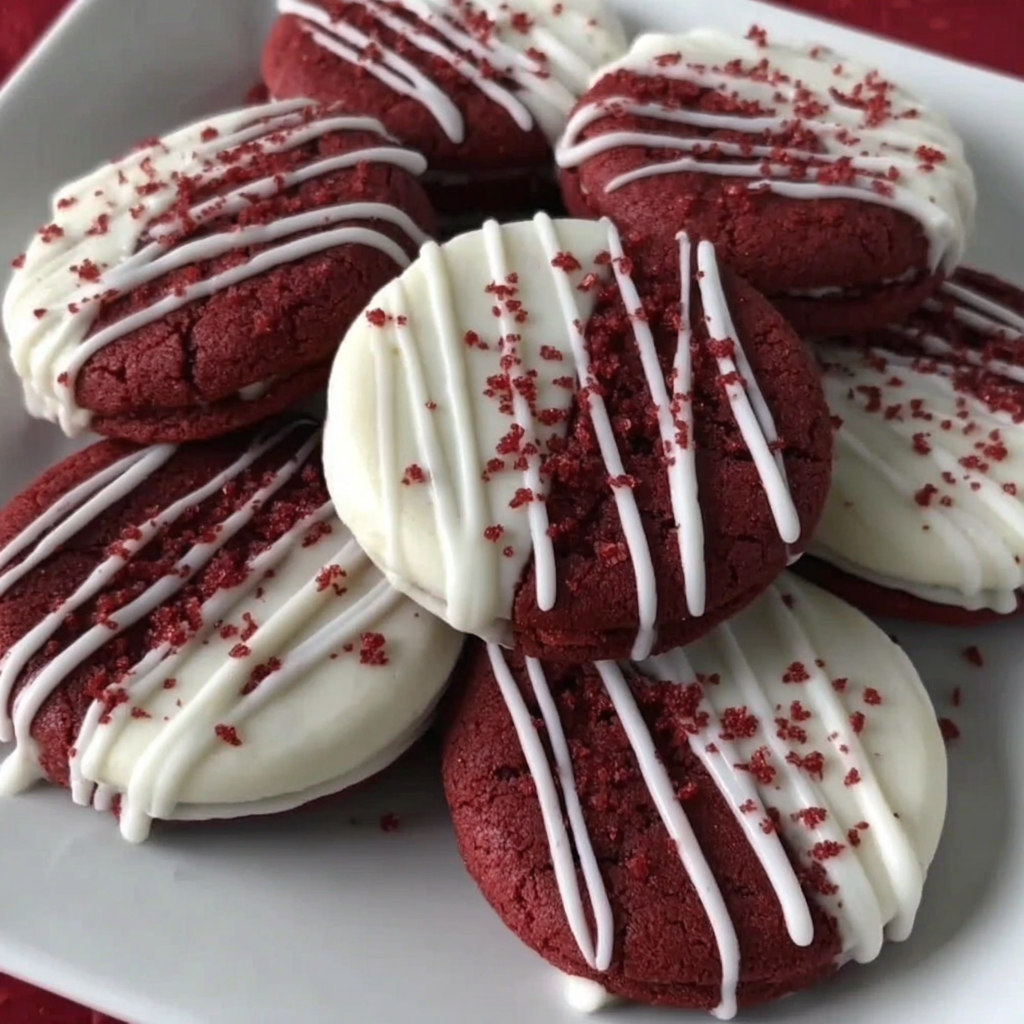
Step 11: Once cookies are completely cool, frost them and enjoy!
Frosting at the right temperature ensures the cream cheese doesn’t melt into the cookies. Enjoy the combination of flavors and textures that make these cookies unforgettable, perfect for any occasion or just a treat for yourself.

The Secret to Chewy Beauty
Achieving the perfect chewy texture in these cookies lies in balancing ingredients and baking time. The harmony between butter and sugar creates a rich base, while the proper mixing and care in cooking ensures they don't turn dry. Remember, underbaking slightly leads to that soft interior that complements the crisp edges.
Color Matters: The Role of Food Coloring
The vibrancy of red velvet is as much about aesthetics as it is about tradition. Using red food coloring not only enhances the visual appeal but also underscores the unique identity of these cookies. It’s essential to use gel food coloring, which provides a more concentrated color and better results than standard liquid versions.
Frosting: A Creamy Essential
Frosting can elevate cookies to new heights, and in this recipe, the cream cheese frosting adds that signature tangy flavor. This balance of sweetness and acidity harmonizes beautifully with the rich cookie base, making every bite an indulgence. Make sure to let the cookies cool completely before frosting to maintain their ideal texture.
FAQs
Why are my cookies too thick?
If your cookies are too thick, it might be due to over-measuring the flour. Make sure to spoon the flour into the measuring cup and level it off rather than packing it.
What if my cookies came out bland?
Ensure you're using the correct amount of each ingredient and check your baking soda's freshness. If they seem bland, consider adding a pinch more salt or vanilla for enhanced flavor.
Why are my cookies overcooked?
If your cookies are overcooked, it could be due to baking them too long or at too high a temperature. Keep an eye on them towards the end of the baking time and remove them as soon as the edges set.
Can I use different food coloring?
Yes, you can use natural food coloring or even other colors like blue or green for a unique twist on the classic red velvet theme. Just keep in mind that you may need to adjust the amount to achieve the desired shade.
Why are the edges of my cookies not crispy?
If the edges aren’t crispy, check your butter's consistency; melted or too-soft butter can affect texture. Baking longer should also help achieve that crunchy outer layer.
What can I do if my dough feels too runny?
If your dough feels too runny, you can add a tablespoon or two of flour until it reaches a workable consistency. Adjustments may be necessary based on humidity levels.
Conclusion
Red velvet pan-banging cookies are not just a treat; they are an experience that melds nostalgia with creativity. Each bite offers a delightful contrast between the slight crunch of the edges and the soft, rich center. Whether for a celebration or just a personal indulgence, these cookies prove to be a stand-out dessert choice.
As you gather your ingredients and dive into the baking process, remember that the joy of cooking comes from both the anticipation and the delicious reward at the end. Embrace the vibrant colors and flavors, and enjoy the delightful memories you’ll create with each batch.
Recipe Card

Indulgent Red Velvet Pan-Banging Cookies Recipe
Ingredients
- 2 cups all-purpose flour
- 1/2 cup unsweetened cocoa powder
- 1 teaspoon baking soda
- 1/2 teaspoon salt
- 1/2 cup unsalted butter softened
- 1 cup granulated sugar
- 1/2 cup packed light brown sugar
- 1 large egg
- 1 teaspoon vanilla extract
- 1 tablespoon red food coloring
- 1/2 cup cream cheese softened
- 1 cup powdered sugar
Instructions
- Preheat your oven to 350°F (175°C).
- In a large bowl, whisk together the flour, cocoa powder, baking soda, and salt.
- In another large bowl, beat the softened butter, granulated sugar, and brown sugar until creamy.
- Add in the egg, vanilla, and red food coloring, mixing until combined.
- Gradually add the dry ingredients to the wet mixture, mixing until just combined.
- Scoop the dough onto a lined baking sheet, spacing each cookie about 2 inches apart.
- Bang the baking sheet against the counter right after placing the cookies in the oven.
- Bake for 10-12 minutes, until the edges are set but the centers remain soft.
- Allow the cookies to cool on the baking sheet for 5 minutes before transferring to a wire rack.
- While the cookies cool, prepare the cream cheese frosting by beating the cream cheese and powdered sugar until smooth and creamy.
- Once cookies are completely cool, frost them and enjoy!
Notes
Additional serving suggestions: pair with a crisp salad, garlic bread, or roasted seasonal vegetables for balance.
For make-ahead, prep components separately and assemble just before heating to preserve texture.
Taste and adjust with acid (lemon/vinegar) and salt right at the end to wake up flavors.