Introduction
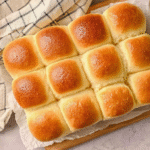
There’s something inherently comforting about freshly baked bread rolls. Their soft texture and warm aroma can elevate any meal, whether it’s a holiday feast or a casual weeknight dinner. These fluffy bread rolls are not just a delicious addition; they’re a symbol of home and togetherness.
The secret to achieving that perfect, light texture lies in the ingredients and techniques used during preparation. By allowing your dough to rise properly and incorporating the right amounts of moisture and warmth, you’ll be rewarded with rolls that are airy and satisfying. Let’s explore the ingredients that make these rolls a success.
Ingredients
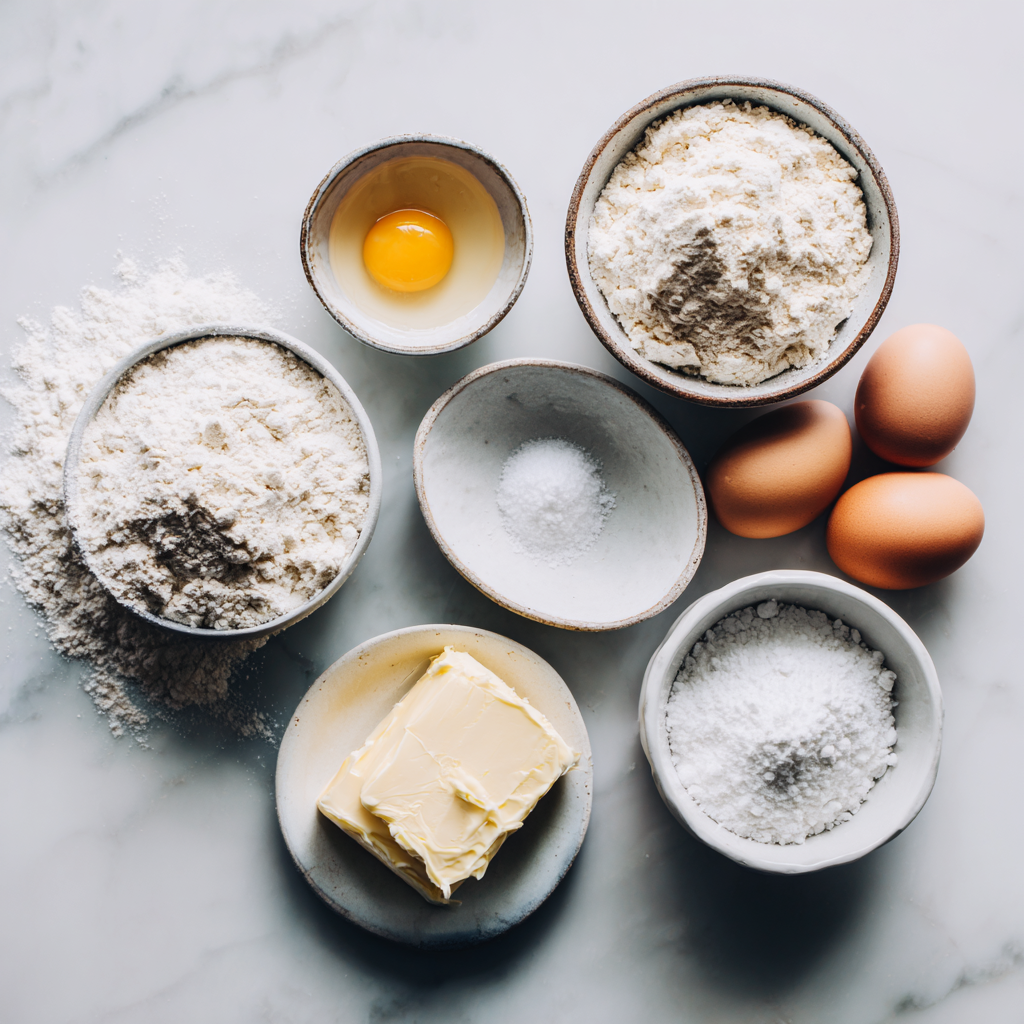
- 4 cups all-purpose flour
All-purpose flour provides the necessary structure for the bread rolls. Its moderate protein content allows for gluten development, which is essential for that desired chewy texture. - 1 packet (2 1/4 teaspoons) active dry yeast
Yeast is the leavening agent that causes the dough to rise. It ferments the sugars in the dough, producing carbon dioxide that makes the rolls light and fluffy. - 1 1/2 teaspoons salt
Salt enhances flavor and controls the fermentation process by slowing down yeast activity, which is important for developing the bread’s overall texture and flavor. - 1 tablespoon sugar
Sugar provides food for the yeast, promoting fermentation and a light texture. It also adds a touch of sweetness, balancing the flavor. - 1 1/2 cups warm milk (110°F)
Warm milk helps to activate the yeast quickly and contributes to the dough’s moisture, resulting in tender rolls. The fat in milk also enriches the dough. - 1/4 cup unsalted butter, melted
Melted butter enriches the dough, giving the rolls a rich flavor and soft texture. It also adds moisture, contributing to the desired fluffiness. - 1 large egg
Eggs add structure and richness to the dough, enhancing its flavor and improving the overall texture of the bread rolls.
Directions & Preparation
Step 1: Activate the yeast by combining it with warm milk and sugar, then let it sit until frothy.
Activating the yeast is crucial; it confirms that the yeast is alive and ready to leaven your dough. Waiting for the mixture to become frothy indicates that the yeast is active and can properly aerate your rolls.
Step 2: In a large bowl, mix the flour and salt together.
Combining the flour and salt evenly distributes the salt, which is important for flavor and yeast control. This step lays the groundwork for a well-mixed dough.
Step 3: Make a well in the flour mixture and add the yeast mixture, melted butter, and the beaten egg.
Creating a well ensures that liquids and dry ingredients combine seamlessly. This method prevents dry flour from sticking to the bottom and helps in creating a cohesive dough.
Step 4: Stir until a shaggy dough forms, then knead for about 10 minutes.
Kneading develops gluten, which is essential for the bread’s structure. A well-kneaded dough should be smooth and elastic, providing the right texture for fluffy rolls.
Step 5: Place the dough in a greased bowl and cover it with a damp cloth, allowing it to rise in a warm place until doubled in size, about 1-2 hours.
This step is where fermentation occurs. The warmth encourages yeast activity, resulting in carbon dioxide bubbles that cause the dough to rise. Ensuring the dough doubles in size indicates it’s properly aerated.
Step 6: Once risen, punch down the dough to release excess gas and knead gently for a minute.
Punching down the dough redistributes the yeast and gases, leading to a finer crumb texture in the final rolls. This step also prepares the dough for shaping.
Step 7: Divide the dough into 12 equal portions and shape them into rolls.
Dividing the dough ensures uniform size, which helps in even baking. Shaping the rolls tightly allows them to rise well and hold their structure during baking.
Step 8: Arrange the rolls in a greased baking pan and cover to rise again for about 30-45 minutes.
This final rise allows the rolls to expand, creating that characteristic fluffiness. Covering them prevents drying out and maintains moisture during this critical phase.
Step 9: Preheat your oven to 375°F (190°C) while the rolls are rising.
Preheating the oven ensures the rolls bake evenly from the moment they go in, giving a nice rise and crust. It’s important for the rolls to hit a hot surface to achieve that desirable texture.
Step 10: Bake the rolls in the preheated oven for 15-20 minutes until golden brown on top.
Baking time is crucial for developing a crust and internal texture. Golden brown tops signal that the rolls are baked through, providing an inviting look and taste.
Step 11: Remove from the oven and brush with additional melted butter, if desired, for shine and flavor.
Brushing with butter adds flavor and moisture, making the rolls extra appealing. This step not only enhances appearance but also enriches the overall eating experience.
The Importance of Hydration in Bread
Water is a fundamental component in any bread recipe, influencing texture and volume. For fluffy rolls, maintaining the right hydration level ensures proper gluten development. Overly dry dough can lead to dense rolls, while too much moisture may prevent the structure from holding. Adjusting flour and liquid ratios can make a significant difference.
Understanding Yeast Fermentation
Yeast fermentation is essential to creating light, airy bread rolls. During fermentation, the yeast consumes sugars and produces carbon dioxide, which forms bubbles in the dough. This process not only helps the dough to rise but also contributes to the complex flavors of the final product. A proper rise time is crucial, so patience is key.
Shaping Techniques for Perfect Rolls
Shaping is a critical step that affects the final product’s appearance and texture. When forming rolls, creating surface tension by tucking the dough under itself is important for achieving a round, well-shaped roll. This technique allows the dough to rise uniformly and develops a pleasing crust during baking.
FAQs
What if my dough isn’t rising?
If your dough isn’t rising, check the yeast’s freshness; if it’s expired, it won’t activate. Also, ensure your rising environment is warm enough—ideally around 75°F to 85°F. If the room is too cold, consider moving the dough to a warmer spot.
How can I tell if the rolls are baked properly?
The rolls should be golden brown and sound hollow when tapped on the bottom. Using a kitchen thermometer, the internal temperature should reach around 190°F for optimal doneness.
Can I make smaller rolls using this recipe?
Absolutely! You can divide the dough into smaller portions to create slider-sized rolls. Adjust the baking time to about 10-15 minutes, checking for doneness as they will bake faster.
What if my rolls turn out too dense?
If your rolls are dense, it could be due to under-proofing or insufficient kneading. Make sure to respect rising times and fully develop gluten during kneading for a lighter texture.
How do I enhance the flavor of the bread rolls?
Consider adding herbs, garlic powder, or cheese directly into the dough before mixing. These ingredients can elevate flavor profiles without compromising the fluffiness.
Can I use whole wheat flour instead of white flour?
Whole wheat flour can be used for a slightly denser roll, but it typically requires additional liquid for proper hydration. You may also want to combine it with all-purpose flour to achieve a lighter texture.
Conclusion
Baking fluffy bread rolls at home is an achievable goal with a little patience and the right technique. Each step contributes to the lightness and flavor of the finished product, fostering a delightful baking experience.
Serve these rolls warm, and watch as they become a beloved favorite at your table. With practice, you can even start experimenting with additives like herbs and spices to create your own signature rolls.
Recipe Card
Secrets to Making Light and Fluffy Bread Rolls
Ingredients
- 4 cups all-purpose flour
- 1 packet 2 1/4 teaspoons active dry yeast
- 1 1/2 teaspoons salt
- 1 tablespoon sugar
- 1 1/2 cups warm milk 110°F
- 1/4 cup unsalted butter melted
- 1 large egg
Instructions
- Activate the yeast by combining it with warm milk and sugar, then let it sit until frothy.
- In a large bowl, mix the flour and salt together.
- Make a well in the flour mixture and add the yeast mixture, melted butter, and the beaten egg.
- Stir until a shaggy dough forms, then knead for about 10 minutes.
- Place the dough in a greased bowl and cover it with a damp cloth, allowing it to rise in a warm place until doubled in size, about 1-2 hours.
- Once risen, punch down the dough to release excess gas and knead gently for a minute.
- Divide the dough into 12 equal portions and shape them into rolls.
- Arrange the rolls in a greased baking pan and cover to rise again for about 30-45 minutes.
- Preheat your oven to 375°F (190°C) while the rolls are rising.
- Bake the rolls in the preheated oven for 15-20 minutes until golden brown on top.
- Remove from the oven and brush with additional melted butter, if desired, for shine and flavor.
Notes
Additional serving suggestions: pair with a crisp salad, garlic bread, or roasted seasonal vegetables for balance.
For make-ahead, prep components separately and assemble just before heating to preserve texture.
Taste and adjust with acid (lemon/vinegar) and salt right at the end to wake up flavors.