Introduction
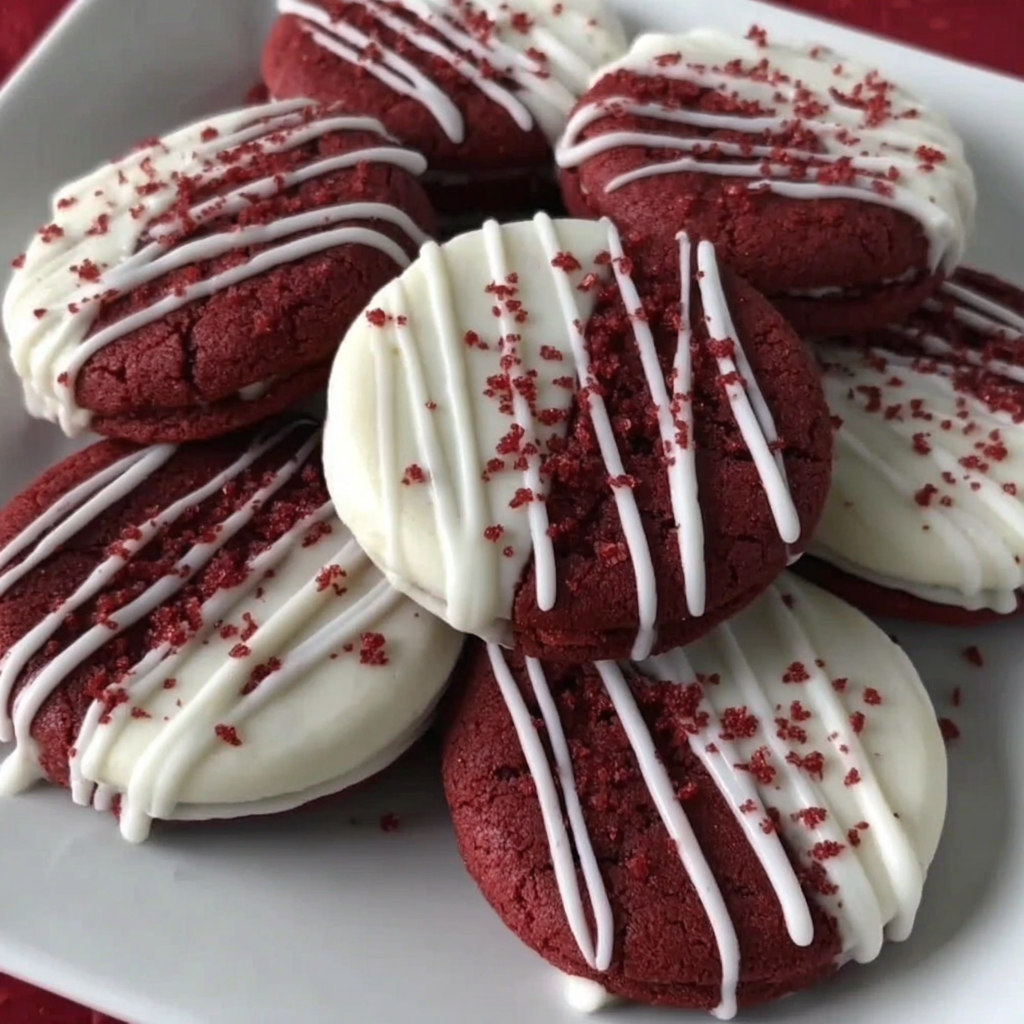
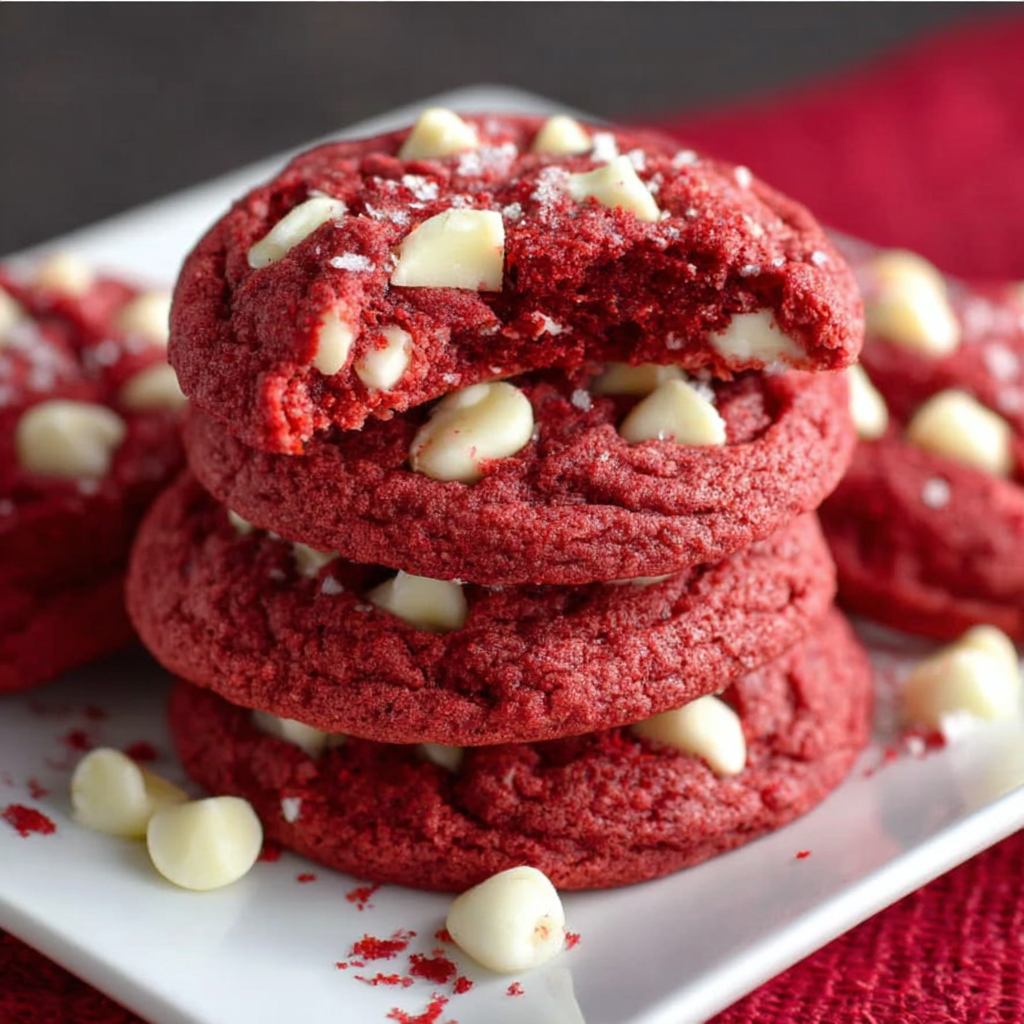
Red Velvet Cookies capture the essence of the beloved red velvet cake in a portable, chewy format that’s perfect for any event. The combination of rich cocoa and a hint of vanilla, coupled with a stunning red hue, creates a treat that’s both visually appealing and delicious. Whether it’s a gathering of friends or a cozy night in, these cookies are sure to impress.
The magic of red velvet lies in its unique flavor profile, blending the richness of chocolate with a balance of tangy cream cheese. This recipe takes that classic taste and transforms it into a cookie that’s easy to make and share, allowing home cooks to elevate their baking game with minimal effort. Let’s dive into the world of red velvet cookies and discover how to make these delightful treats.
Ingredients
- 1 ½ cups all-purpose flour
The foundation of your cookie, flour provides structure and stability. It balances the other wet ingredients and helps achieve the ideal chewy texture. - 1 tbsp cocoa powder
Cocoa powder not only deepens the flavor but also adds a subtle richness that complements the vanilla and enhances the cookie's overall taste. - 1 tsp baking soda
Baking soda acts as a leavening agent, helping the cookies rise and achieve a light texture. It's essential for creating that perfect cookie shape. - ½ tsp salt
Salt amplifies flavor, enhancing sweetness and balancing the other ingredients. It helps elevate the overall taste profile of the cookies. - ½ cup unsalted butter, softened
Butter contributes to the cookies' rich flavor and tender texture. It also helps with browning, giving the cookies a beautiful appearance. - 1 cup granulated sugar
Sugar provides sweetness and contributes to the cookie's texture. It plays a crucial role in the creaming process, incorporating air for a light cookie. - 1 large egg
The egg adds moisture and richness, binding the ingredients together while also helping the cookies set during baking. - 1 tsp vanilla extract
Vanilla extract enhances the overall flavor profile, adding depth and a comforting aroma that pairs beautifully with the cocoa. - 1 tbsp red food coloring
Food coloring gives these cookies their signature vibrant red hue, making them visually striking and fun to eat. - ½ cup white chocolate chips (optional)
White chocolate chips provide additional sweetness and a contrasting creamy texture that complements the rich red velvet flavor.
Directions & Preparation
Step 1: Preheat your oven to 350°F (175°C) and line a baking sheet with parchment paper.
Preheating ensures the cookies start baking at the right temperature, helping them rise and cook evenly. Lining the baking sheet prevents sticking and makes cleanup easier.
Step 2: In a medium bowl, whisk together the flour, cocoa powder, baking soda, and salt until well combined.
This step ensures even distribution of the dry ingredients, preventing clumps that could affect the cookie texture. Whisking aerates the mixture, contributing to a lighter final product.
Step 3: In a large bowl, beat the softened butter and sugar together until light and fluffy, about 2-3 minutes.
Creaming the butter and sugar together incorporates air, enhancing the cookie's texture. The process also dissolves sugar, which is crucial for a smooth dough.
Step 4: Add the egg, vanilla extract, and red food coloring to the butter mixture, mixing until well combined.
Incorporating these wet ingredients adds moisture and flavor, while the red food coloring ensures the signature look. Mix until the color is evenly distributed, revealing a vibrant base.
Step 5: Gradually add the dry flour mixture to the wet ingredients, mixing until just combined. Avoid overmixing.
Slowly incorporating the dry mixture prevents the development of gluten, keeping your cookies tender. Stop mixing as soon as the dry ingredients are incorporated to maintain a chewy texture.
Step 6: If desired, fold in white chocolate chips until evenly distributed throughout the dough.
Adding chocolate chips at this stage gives the cookies a delightful surprise with every bite. This addition is optional, but it enhances the flavor profile with extra sweetness.
Step 7: Scoop tablespoon-sized portions of dough onto the prepared baking sheet, leaving space between each cookie.
Spacing the cookies allows for proper spreading and ensures even baking. Aim for uniform scoops for consistent baking and presentation.
Step 8: Bake in the preheated oven for 10-12 minutes or until the edges are set but the centers look slightly underbaked.
Baking until the edges set gives structure while keeping the centers soft ensures a chewy cookie. They will continue to firm up after being removed from the oven due to residual heat.
Step 9: Allow the cookies to cool on the baking sheet for a few minutes before transferring them to a wire rack to cool completely.
Cooling on the sheet helps set the cookies, avoiding breakage during transfer. Once on a wire rack, they can cool evenly, maintaining their texture.

The Secret Ingredients Behind Great Cookies
Achieving the perfect texture in cookies often hinges on a few key ingredients. For red velvet cookies, the balance of butter and sugar is crucial; it not only affects the flavor but also the moisture level. Additionally, the cocoa powder and red food coloring work in harmony, creating not just a cookie that’s fantastically vibrant, but also deeply flavored. Each component plays its part in ensuring a delightful experience.
Why Chilling Your Dough is Important
Chilling cookie dough can significantly enhance the flavor and texture of your cookies. It allows the ingredients to meld together, resulting in a richer taste. Chilling the dough also firms it up, which helps the cookies maintain their shape during baking. For red velvet cookies, this step is even more beneficial as it can prevent excessive spreading, leading to a more structured cookie.
Pairing Suggestions for Red Velvet Cookies
Red velvet cookies are wonderfully versatile and pair beautifully with a variety of beverages. For a comforting experience, enjoy them with a glass of cold milk or a rich hot chocolate. They also complement a warm cup of coffee, balanced perfectly by the cookie’s sweetness. For a festive touch, consider serving them with a scoop of vanilla ice cream, turning your red velvet cookies into a decadent dessert.
FAQs
What should I do if my cookie dough is too thick?
If your dough feels too thick, you can add a tablespoon of milk to help loosen it. Mix thoroughly to incorporate the milk evenly.
Can I use cake flour instead of all-purpose flour?
Using cake flour may result in a softer cookie due to its lower protein content. If you opt for cake flour, consider reducing the amount slightly to avoid overly puffy cookies.
Why did my cookies turn out dry?
Dry cookies can occur from overbaking or using too much flour. Always measure flour correctly and monitor your cookies closely during the last few minutes of baking.
What if I want to scale the recipe for a larger batch?
You can easily double the recipe, just be sure to adjust baking times accordingly and use multiple trays for an even bake.
Can I use different add-ins instead of white chocolate chips?
Absolutely! Feel free to substitute with dark chocolate chips, nuts, or dried fruit for a unique twist on the classic flavor.
How can I make my cookies more flavorful?
Consider adding a pinch more salt or an additional teaspoon of vanilla extract to enhance flavor depth. You could also increase the cocoa powder slightly for a richer chocolate taste.
Conclusion
Making red velvet cookies at home is a rewarding experience that combines classic flavors with delightful visuals. These cookies are not only easy to make, but they also add a touch of elegance to any dessert table. Plus, they can be customized with different mix-ins to suit your preferences.
Whether you’re baking for a special occasion or just for yourself, red velvet cookies will leave a lasting impression. Embrace the joy of baking and enjoy the process as much as the final treat!
Recipe Card
Decadent Red Velvet Cookies for Every Occasion
Ingredients
- 1 ½ cups all-purpose flour
- 1 tbsp cocoa powder
- 1 tsp baking soda
- ½ tsp salt
- ½ cup unsalted butter softened
- 1 cup granulated sugar
- 1 large egg
- 1 tsp vanilla extract
- 1 tbsp red food coloring
- ½ cup white chocolate chips optional
Instructions
- Preheat your oven to 350°F (175°C) and line a baking sheet with parchment paper.
- In a medium bowl, whisk together the flour, cocoa powder, baking soda, and salt until well combined.
- In a large bowl, beat the softened butter and sugar together until light and fluffy, about 2-3 minutes.
- Add the egg, vanilla extract, and red food coloring to the butter mixture, mixing until well combined.
- Gradually add the dry flour mixture to the wet ingredients, mixing until just combined. Avoid overmixing.
- If desired, fold in white chocolate chips until evenly distributed throughout the dough.
- Scoop tablespoon-sized portions of dough onto the prepared baking sheet, leaving space between each cookie.
- Bake in the preheated oven for 10-12 minutes or until the edges are set but the centers look slightly underbaked.
- Allow the cookies to cool on the baking sheet for a few minutes before transferring them to a wire rack to cool completely.
Notes
Additional serving suggestions: pair with a crisp salad, garlic bread, or roasted seasonal vegetables for balance.
For make-ahead, prep components separately and assemble just before heating to preserve texture.
Taste and adjust with acid (lemon/vinegar) and salt right at the end to wake up flavors.