Introduction
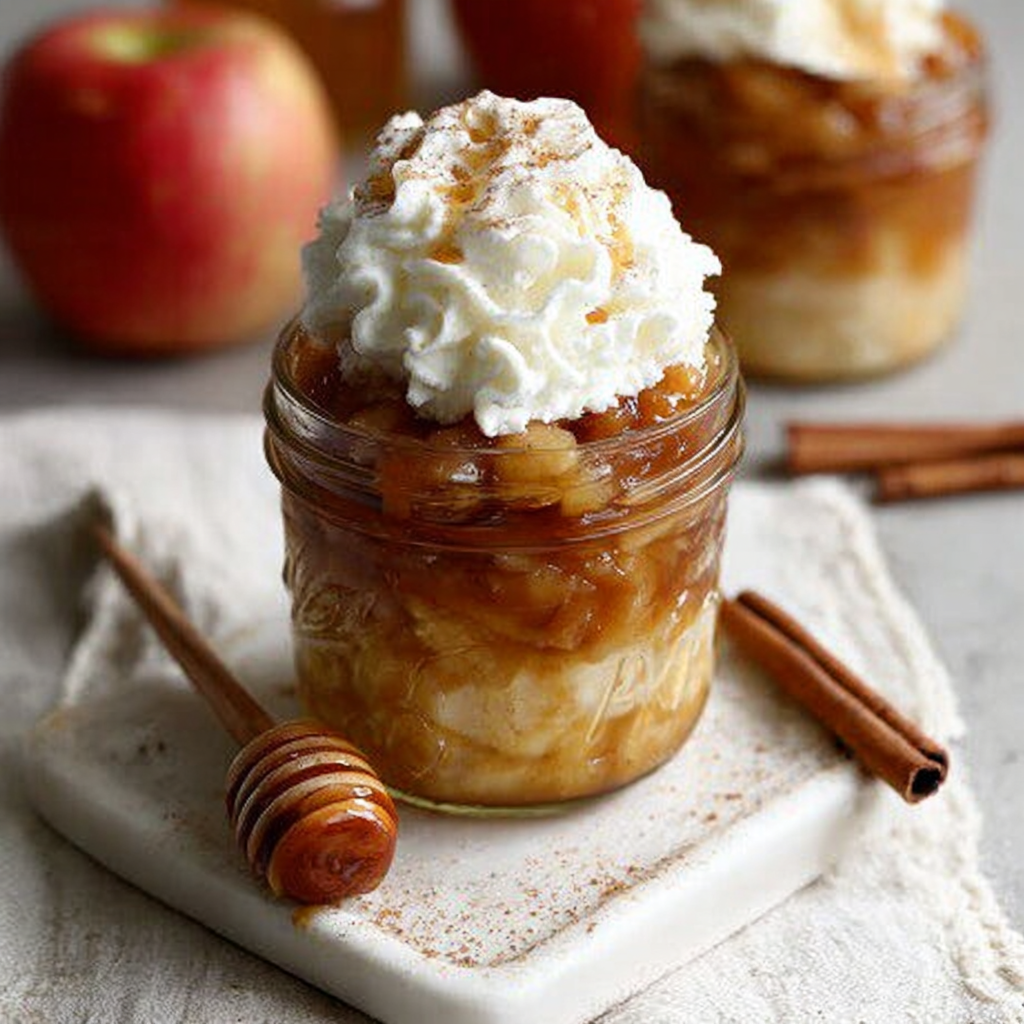
Mason jar desserts have become a delightful trend in the culinary world, and for good reason. They offer a portable, charming presentation, allowing you to enjoy your favorite treats anywhere. Among these, the Mason jar apple pie stands out as a comforting dessert that brings a touch of homemade goodness to any table.
With layers of spiced apples, buttery crust, and that iconic pie flavor, this innovative take on a classic dessert makes it easier to serve and share. Plus, the individual servings mean everyone gets a piece of the action without the hassle of slicing a full pie. Let's dive into making this comforting treat.
Ingredients
- 4 cups sliced apples (such as Granny Smith or Honeycrisp)
These apples provide the base for the filling. Their tartness balances the sweetness of the sugar and ensures a flavorful pie filling. - 3/4 cup granulated sugar
Sugar sweetens the apple filling and helps to create a syrupy consistency that enhances the fruit's natural flavors. - 1 tsp cinnamon
Cinnamon adds warmth and depth to the apple mixture, bringing out the spices often found in traditional apple pie and evoking a sense of comfort. - 1/4 tsp nutmeg
Nutmeg introduces a subtle spice that complements the cinnamon, creating a more complex and aromatic filling. - 1 tbsp lemon juice
Lemon juice prevents the apples from browning and brightens the overall flavor of the pie, counteracting the sweetness. - 1/4 cup all-purpose flour
Flour thickens the filling, ensuring it holds together in the jar without becoming too runny after baking. - 1 batch pie crust (store-bought or homemade)
The pie crust serves as the base and top layer, providing a buttery, flaky texture that contrasts beautifully with the tender apples. - 1 egg (for egg wash)
The egg wash gives the crust a beautiful golden color during baking, enhancing its visual appeal.
Directions & Preparation
Step 1: Preheat the oven to 375°F (190°C).
Preheating the oven ensures even cooking from the start. If the oven is not hot enough, the pie may cook unevenly, leading to a soggy crust or overly soft apples.
Step 2: Prepare the apple filling: In a large bowl, combine the sliced apples, sugar, cinnamon, nutmeg, lemon juice, and flour.
Mixing the filling ingredients well ensures that every apple slice is coated with the sweet and spiced mixture. This step is crucial for achieving a cohesive flavor and thickened filling once baked.
Step 3: Roll out the pie crust and cut into circles that fit your mason jars.
This is where the fun begins! Rolling out the crust and cutting it to fit your jars not only makes for a better presentation but also ensures each jar is filled evenly. Use a floured surface to prevent sticking.
Step 4: Layer the apple mixture into the mason jars until filled halfway.
Layering the apples generously helps maintain the jars’ structure during baking while allowing room for the crust on top. This balance is key to achieving that classic pie experience.
Step 5: Top with the pie crust circle, crimping the edges to seal. Cut a small slit in the top to allow steam to escape.
Sealing the jars prevents any filling spillage while baking, but the steam vents are essential to avoid a soggy crust. This step is important for achieving the perfect texture.
Step 6: Brush the top of the crust with the egg wash for a golden finish.
The egg wash elevates the pie aesthetic with a glossy, golden crust that looks as good as it tastes. It’s a small but impactful detail!
Step 7: Arrange the jars on a baking sheet and bake for 25-30 minutes or until the crust is golden brown.
Using a baking sheet makes for easier cleanup and helps catch any bubbling over. Watching the crust develop its color is also satisfying!
Step 8: Remove from the oven and let cool slightly before serving.
Allowing the jars to cool slightly helps set the filling and prevents burns. Once cooled, they are ready to be enjoyed or stored!

Choosing the Right Apples
The choice of apple is critical for the flavor and texture of your Mason jar apple pie. Varieties like Granny Smith offer tartness, while Honeycrisp give sweetness with a satisfying crunch. A mix of both types brings depth to the filling, making each bite a delightful balance of flavors.
Making Your Own Pie Crust
While store-bought crust is convenient, making your own brings a homemade touch that enhances the overall taste of your Mason jar apple pie. A simple dough with flour, butter, and a dash of salt can achieve that flaky texture. The freshness of a homemade crust is worth the extra effort!
Serving Suggestions and Variations
While this apple pie is delicious on its own, consider adding a scoop of vanilla ice cream or a dollop of whipped cream over the top just before serving. You can also experiment by adding dried fruits or nuts to the filling for additional texture and taste variations.
FAQs
What should I do if my Mason jar apple pie filling is too runny?
If your filling is too runny, try increasing the amount of flour in the filling mix before baking, or let it cool completely before serving to help it thicken.
Can I use other fruits besides apples in this recipe?
Yes, you can use other fruits like pears or peaches, but adjust the sugar and spices according to the sweetness and flavor of the substitute fruits.
What if my crust doesn't turn golden brown?
If your crust isn't browning, ensure that you've brushed it with enough egg wash and consider baking it a little longer, keeping an eye to prevent burning.
Can I make the filling the night before?
Absolutely! Prepare the apple filling ahead of time and store it in the refrigerator, then fill your jars and bake when you're ready to enjoy.
Is there a specific type of mason jar I should use?
Using regular wide-mouth mason jars is best for this recipe. They provide ample space for the filling and are easy to eat from.
How do I know when my pie jars are done baking?
Look for a golden brown crust and bubbling filling around the edges. If the tops are browning too quickly, cover them lightly with foil.
Conclusion
Creating Mason jar apple pies is an enjoyable way to blend tradition with modern convenience. The charming presentation and individual servings make it a perfect dessert for gatherings or a cozy family dinner.
With the right ingredients and a bit of attention to detail, you can serve up this comforting dessert that evokes the warmth of a classic apple pie. Dive into baking, and let your creativity shine!
Recipe Card

Delicious Mason Jar Apple Pie for Home Cooks
Ingredients
- 4 cups sliced apples such as Granny Smith or Honeycrisp
- 3/4 cup granulated sugar
- 1 tsp cinnamon
- 1/4 tsp nutmeg
- 1 tbsp lemon juice
- 1/4 cup all-purpose flour
- 1 batch pie crust store-bought or homemade
- 1 egg for egg wash
Instructions
- Preheat the oven to 375°F (190°C).
- Prepare the apple filling: In a large bowl, combine the sliced apples, sugar, cinnamon, nutmeg, lemon juice, and flour.
- Roll out the pie crust and cut into circles that fit your mason jars.
- Layer the apple mixture into the mason jars until filled halfway.
- Top with the pie crust circle, crimping the edges to seal. Cut a small slit in the top to allow steam to escape.
- Brush the top of the crust with the egg wash for a golden finish.
- Arrange the jars on a baking sheet and bake for 25-30 minutes or until the crust is golden brown.
- Remove from the oven and let cool slightly before serving.
Notes
Additional serving suggestions: pair with a crisp salad, garlic bread, or roasted seasonal vegetables for balance.
For make-ahead, prep components separately and assemble just before heating to preserve texture.
Taste and adjust with acid (lemon/vinegar) and salt right at the end to wake up flavors.