Introduction
Cannoli, the beloved Italian pastry, has long been a favorite among dessert lovers. With its rich and creamy filling enveloped in a crisp shell, it’s a treat that tantalizes the taste buds. However, making traditional cannoli can be somewhat of a labor-intensive process.
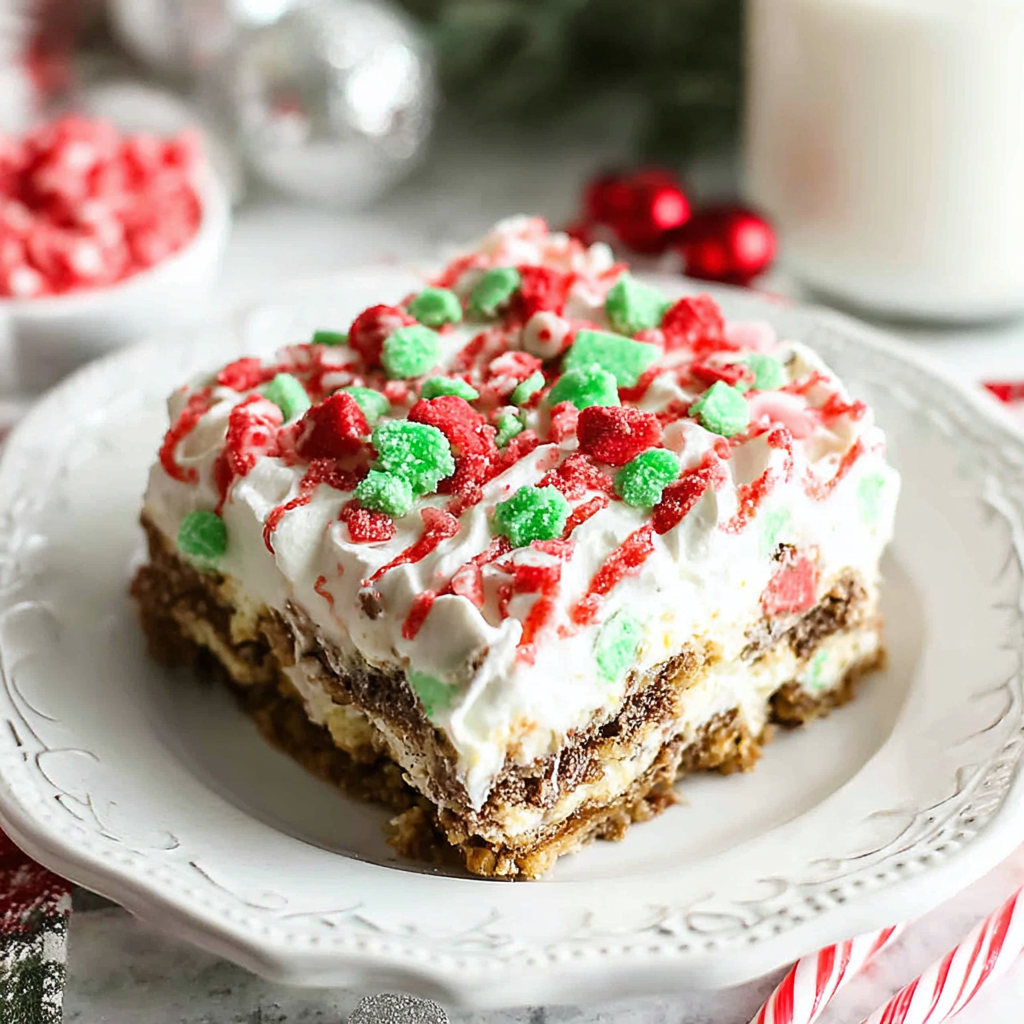
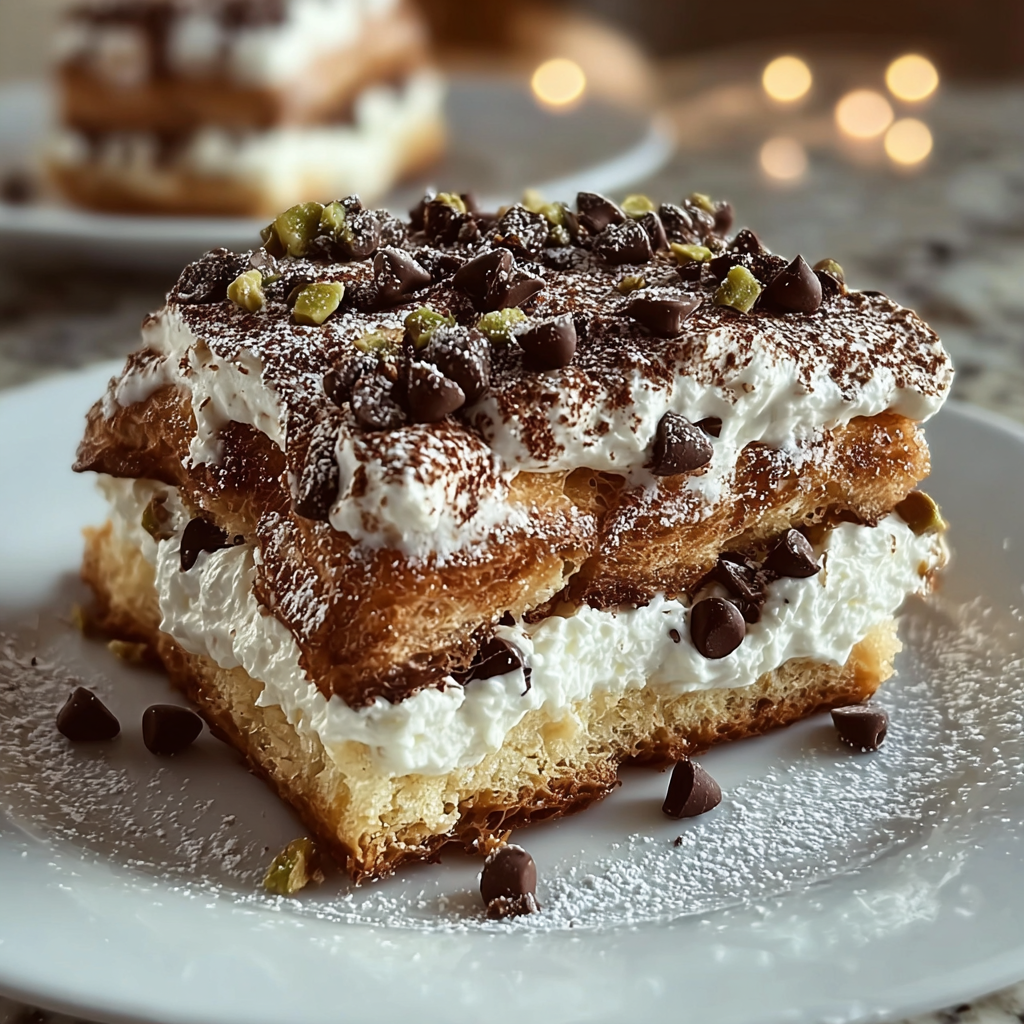
Enter Classic Cannoli Squares—a simplified yet equally indulgent take on the classic dessert. This recipe captures the essence of cannoli by layering a luscious ricotta filling with a buttery crust, delivering all the flavors without the fuss of shaping individual pastries.
Ingredients

- 1 ¼ cups all-purpose flour
The foundation of the crust, all-purpose flour provides structure and stability. It forms the base for our squares, holding the filling intact while ensuring a tender yet sturdy bite. - ½ cup unsalted butter, softened
Butter enriches the crust with flavor and tenderizes it, making it flaky and melt-in-your-mouth delicious. Ensure it’s softened for easy blending with the flour. - ⅓ cup granulated sugar
Sugar adds sweetness to the crust and balances the rich flavors of the filling. It also helps create a desirable texture by contributing to the crispness when baked. - 1 large egg
The egg acts as a binding agent, helping to hold the crust together. It also adds moisture and richness, enhancing the overall flavor and texture. - 1 teaspoon vanilla extract
Vanilla extract infuses the crust with warmth and a hint of aromatic flavor. It elevates the overall taste profile, making each bite more enjoyable. - 1 cup whole milk ricotta cheese
Ricotta cheese is the star of the filling, offering a creamy texture and mild flavor. When combined with other ingredients, it creates that signature cannoli taste we all love. - ½ cup powdered sugar
Powdered sugar sweetens the ricotta filling without altering its texture significantly. It blends seamlessly, resulting in a smooth and creamy mixture. - ½ teaspoon ground cinnamon
Cinnamon adds a warm and spicy note to the filling, enhancing the flavors and creating a comforting taste experience associated with traditional Italian sweets. - ½ teaspoon orange zest
Orange zest brightens the filling, adding a refreshing citrus aroma. It balances the richness of the ricotta and provides an additional layer of flavor. - 1 teaspoon chocolate chips (optional)
Mini chocolate chips add a delightful touch to the filling, providing little bursts of sweetness. They are optional, but many find they enhance the overall appeal.
Directions & Preparation
Step 1: Preheat the oven to 350°F (175°C).
Preheating ensures that the oven reaches the desired temperature before the crust goes in, helping it to bake evenly. This is crucial for achieving a golden, crisp result.
Step 2: In a mixing bowl, combine the flour, sugar, and butter until crumbly.
This step creates the base crust by blending dry ingredients with butter until it resembles coarse crumbs. It ensures that the butter is evenly distributed, leading to a flaky texture after baking.
Step 3: Add the egg and vanilla extract to the mixture; blend until incorporated.
Incorporating the egg and vanilla adds moisture and flavor to the crust. Mixing until just combined avoids overworking the dough, which can lead to a tough crust.
Step 4: Press the mixture into the bottom of a greased square baking dish.
Evenly pressing the crust into the baking dish provides a solid base for the squares. Ensure the layer is uniform to allow for even baking and consistent texture.
Step 5: Bake the crust for 20–25 minutes, or until lightly golden.
Baking until golden helps develop flavor and ensures a crispy texture. Be careful not to overbake, as this can lead to a dry crust.
Step 6: While the crust is baking, prepare the filling by mixing ricotta, powdered sugar, cinnamon, orange zest, and optional chocolate chips.
Combining these ingredients creates a smooth and flavorful filling. Taste the mixture after blending to ensure the balance of flavors is to your liking.
Step 7: Once the crust has cooled, spread the ricotta mixture evenly over the top.
Spreading the filling over the cooled crust prevents it from melting into the warm base. This keeps the textures distinct and enjoyable.
Step 8: Refrigerate the assembled squares for at least 2 hours before serving.
Chilling allows the flavors to meld and the filling to set, making cutting into squares easier and ensuring a more cohesive dessert.
Step 9: Cut into squares and serve, garnishing with additional powdered sugar, if desired.
Serving chilled enhances the refreshing aspect of the dessert. Dusting with powdered sugar is a simple yet elegant touch that mimics traditional cannoli presentations.
The Perfect Crust
Achieving the ideal crust is crucial for cannoli squares. The technique of combining the flour and butter creates a flaky texture, while the addition of sugar provides sweetness. A careful balance between all ingredients ensures that the crust is not only delicious but also complements the creamy filling. Remember to avoid overmixing when adding the egg and vanilla, as this keeps the crust tender.
Creamy Filling Innovations
The filling is where creativity shines. Traditional cannoli is known for its ricotta filling, but the beauty of cannoli squares allows for variations. Experimenting with flavorings—like almond extract or different spices—can give this classic a unique twist. Additionally, the option of adding mini chocolate chips introduces fun surprises in each bite, making the dessert even more delightful.
Serving and Enjoying
Presentation is key when serving cannoli squares. These squares can be garnished elegantly with fresh fruits, a drizzle of chocolate sauce, or additional citrus zest. Each garnish should enhance the overall flavor while also creating an appealing visual component. Enjoyed chilled, these squares make for perfect summer desserts, but they can also bring warmth to cold winter evenings.
FAQs
What can I do if my squares are too soft after chilling?
If the squares are too soft, it may be due to insufficient chilling time. Allow them to chill for longer to help the filling set better.
How can I make my filling smoother if it appears lumpy?
If the filling appears lumpy, try using a food processor to blend it until smooth. This ensures a creamy consistency that mimics traditional cannoli.
What should I do if the crust is too crumbly?
If the crust is too crumbly, it may need more liquid. A small amount of cold water can be added to help bind the dough together without making it wet.
Can I substitute ricotta with mascarpone cheese?
Yes, mascarpone can be used for a richer filling; however, you might want to mix it with a bit of ricotta for texture if you prefer more body.
How can I enhance the flavor of the crust?
Consider adding a pinch of salt or a bit of ground nutmeg to the crust for depth. These additions can deepen the flavor experience.
What if I want to scale the recipe for a larger gathering?
To scale the recipe, simply multiply each ingredient by your desired factor while ensuring you keep the same ratios for the crust and filling.
Conclusion
Classic Cannoli Squares simplify the process of enjoying this iconic Italian dessert, making it accessible for home cooks. With a rich filling and a buttery crust, every bite is a little taste of tradition.
Whether serving at a family gathering or simply indulging yourself, these squares promise to delight. Embrace the flavors of Italy and transform your dessert experience with a delectable slice of cannoli heaven.
Recipe Card

Deliciously Decadent Classic Cannoli Squares
Ingredients
- 1 ¼ cups all-purpose flour
- ½ cup unsalted butter softened
- ⅓ cup granulated sugar
- 1 large egg
- 1 teaspoon vanilla extract
- 1 cup whole milk ricotta cheese
- ½ cup powdered sugar
- ½ teaspoon ground cinnamon
- ½ teaspoon orange zest
- 1 teaspoon chocolate chips optional
Instructions
- Preheat the oven to 350°F (175°C).
- In a mixing bowl, combine the flour, sugar, and butter until crumbly.
- Add the egg and vanilla extract to the mixture; blend until incorporated.
- Press the mixture into the bottom of a greased square baking dish.
- Bake the crust for 20–25 minutes, or until lightly golden.
- While the crust is baking, prepare the filling by mixing ricotta, powdered sugar, cinnamon, orange zest, and optional chocolate chips.
- Once the crust has cooled, spread the ricotta mixture evenly over the top.
- Refrigerate the assembled squares for at least 2 hours before serving.
- Cut into squares and serve, garnishing with additional powdered sugar, if desired.
Notes
Additional serving suggestions: pair with a crisp salad, garlic bread, or roasted seasonal vegetables for balance.
For make-ahead, prep components separately and assemble just before heating to preserve texture.
Taste and adjust with acid (lemon/vinegar) and salt right at the end to wake up flavors.