Introduction
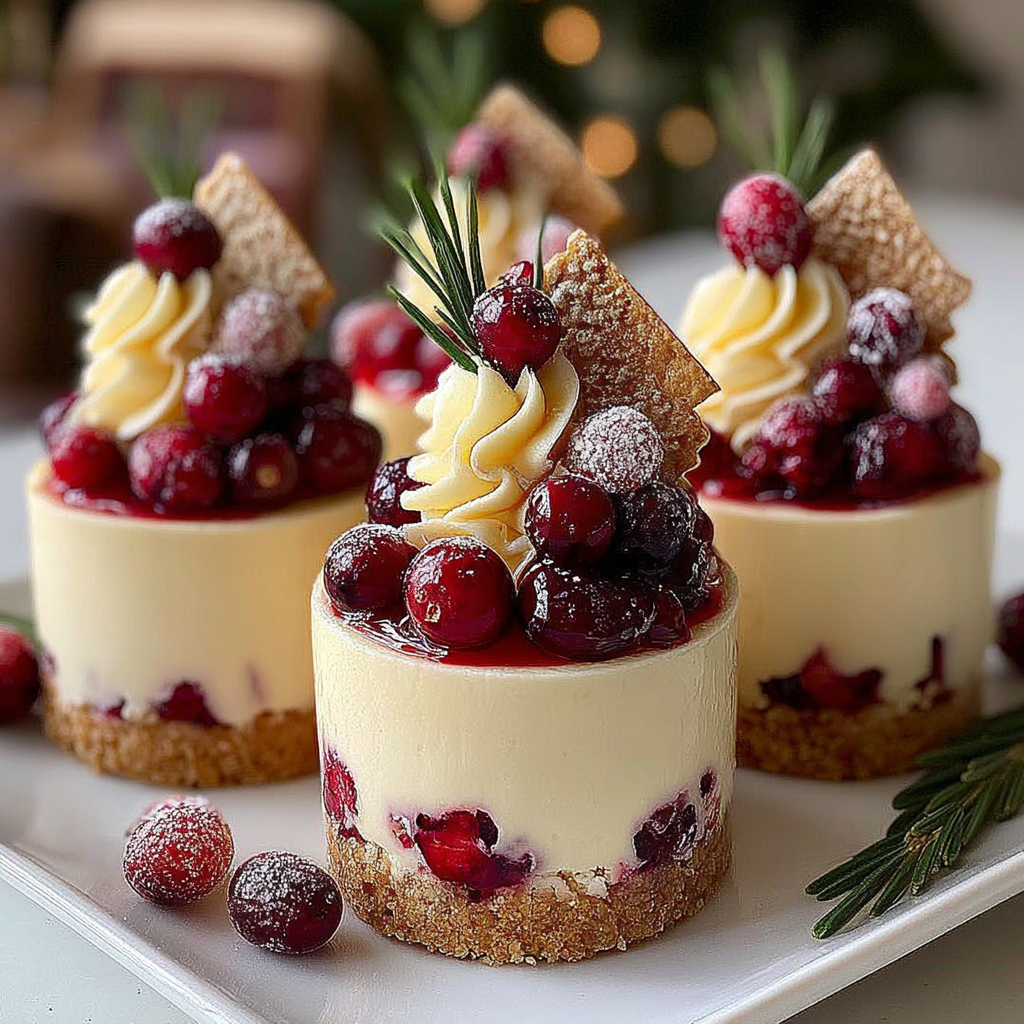
The holiday season brings with it a multitude of flavors, smells, and cherished traditions, each adding to the magical atmosphere of Christmas. Among these seasonal delights, mini cheesecakes shine brightly, especially when adorned as Christmas trees. They create a visually stunning centerpiece for any festive gathering, inviting everyone to indulge in their creamy goodness.
Crafted individually, these mini cheesecakes feature a delightful graham cracker crust paired with a velvety, rich filling, all topped with vibrant green frosting shaped like tree branches. Each bite offers a burst of sweetness, embodying the joy and spirit of the holidays. As you create these miniature cheesecakes, you'll find they not only look gorgeous but are also relatively simple to make, making them accessible to cooks of all levels.
Ingredients
- 1 ½ cups graham cracker crumbs
These crumbs form the base for the cheesecake, contributing a crunchy texture that contrasts beautifully with the creamy filling. - ⅓ cup granulated sugar
Sugar sweetens the crust and filling, balancing the flavors and enhancing the overall taste of the cheesecakes. - ½ cup unsalted butter, melted
Butter acts as the binding agent for the crust, ensuring that the crumbs adhere together while adding richness to the flavor. - 16 oz cream cheese, softened
The star of the cheesecake, cream cheese provides a smooth and creamy texture, lending the cheesecakes their characteristic tangy flavor. - ⅔ cup powdered sugar
Powdered sugar sweetens the cheesecake without adding grittiness, creating a silky filling that melts in your mouth. - 2 large eggs
Eggs help to set the cheesecake, providing structure and stability while helping it rise slightly during baking. - 1 tsp vanilla extract
Vanilla extract adds a warm and inviting aroma, enhancing the overall flavor profile of the cheesecake. - Green frosting (for decoration)
Colored frosting transforms the mini cheesecakes into festive Christmas trees, adding a playful and decorative touch. - Mini chocolate candies (for ornaments)
These candies serve as edible decorations, mimicking ornaments on a Christmas tree and adding a pop of color and sweetness.
Directions & Preparation
Step 1: Preheat the oven to 325°F (165°C).
Preheating the oven ensures that the cheesecakes bake evenly. If the oven is not at the correct temperature when the cheesecakes go in, it can lead to uneven baking, resulting in cracks or a soft center.
Step 2: Prepare a muffin tin with cupcake liners.
Using liners makes it easy to remove the cheesecakes after baking, allowing for clean serving. Lining the muffin tin also aids in portion control and keeps the mini cheesecakes looking neat and tidy.
Step 3: In a medium bowl, combine graham cracker crumbs, granulated sugar, and melted butter until well mixed.
This combination forms the crust. Mixing the ingredients thoroughly ensures an even consistency, which prevents the crust from falling apart when served.
Step 4: Press the crumb mixture firmly into the bottom of each cupcake liner to form the crust.
Pressing the mixture firmly creates a sturdy base that holds the cheesecake filling. A well-formed crust provides a pleasing crunch that contrasts with the creamy filling.
Step 5: In a large mixing bowl, beat the softened cream cheese until smooth.
This step is crucial for achieving a creamy texture in the filling. Beating the cream cheese first helps to eliminate lumps, resulting in a silkier final product.
Step 6: Add the powdered sugar, eggs, and vanilla extract to the cream cheese, mixing until fully incorporated.
Adding ingredients in this order ensures even mixing. Eggs add stability, while powdered sugar sweetens the mixture without altering its creamy nature.
Step 7: Pour the cream cheese mixture over the crusts in the muffin tin.
Filling each liner evenly with the cheesecake mixture ensures uniform baking. This step is key for maintaining consistent texture and flavor across all mini cheesecakes.
Step 8: Bake in the preheated oven for 18-20 minutes, or until the centers are set but still slightly jiggly.
Baking until slightly jiggly ensures the mini cheesecakes remain creamy rather than overcooked. This cue is essential for maintaining the desired texture.
Step 9: Let the cheesecakes cool completely in the tin before transferring to the refrigerator to chill for at least 2 hours.
Cooling in the tin prevents them from cracking as they firm up. Chilling in the refrigerator allows the flavors to meld perfectly, enhancing the overall taste.
Step 10: Once chilled, decorate with green frosting, shaping it into tree branches, and top with mini chocolate candies as ornaments.
Decorating adds visual appeal, transforming these cheesecakes into festive treats. This step allows for creativity and personalization, making them special for the holiday season.

Creating the Perfect Cheesecake Crust
The foundation of any cheesecake lies in its crust, and a well-made graham cracker crust contributes to the overall success of your mini cheesecakes. Combining the right ratio of crumbs, sugar, and melted butter is essential; each component plays a crucial role in texture and flavor. Pressing the crust evenly ensures it holds together when served, creating an enjoyable contrast to the smooth filling.
Cheesecake Filling: Achieving the Right Consistency
The filling of your mini cheesecakes must be rich and creamy, achieved by careful mixing and baking. Using softened cream cheese helps to eliminate lumps, resulting in a silky texture. The balance of powdered sugar and eggs ensures stability without compromising flavor, while the vanilla enhances the overall sensory experience. Keeping an eye on the baking time is vital to avoid overcooking.
Festive Decoration Ideas
Decorating your mini cheesecakes can elevate them from simple desserts to show-stopping holiday treats. Using colored frosting to resemble Christmas trees makes them visually appealing and fun. The addition of mini chocolate candies not only adds color but also creates delightful ‘ornaments’ that enrich their charm. Explore different piping techniques and decorative options to make each one unique!
FAQs
What if my cheesecake batter is too thick?
If the batter is too thick, add a tablespoon of milk or cream to loosen it. Mix well until you achieve the desired creamy consistency.
Can I use store-bought crust instead of making my own?
Yes, store-bought graham cracker crusts can be used for convenience, though this may alter the traditional textures slightly.
Are there any flavor variations for the cheese filling?
Absolutely! Consider adding lemon juice or zest for a citrusy twist, or mix in melted chocolate or seasonal spices to match your holiday theme.
My mini cheesecakes have cracks on top. What went wrong?
Cracks often result from overbaking or rapidly cooling. Ensure you bake until just set and allow them to cool gradually.
Can I adjust the amount of sugar in these cheesecakes?
Yes, you can reduce sugar if desired, but it may affect the sweetness and overall flavor balance. Start by decreasing it slightly and adjust according to taste.
What can I do if I feel the cheesecakes are too sweet?
If the mini cheesecakes are too sweet, consider adding a pinch of salt to the batter or pairing them with a tart topping, like fruit preserves or a drizzle of lemon glaze.
Conclusion
Christmas Tree Mini Cheesecakes are not only a delightful treat but also a creative way to celebrate the holiday season. Their charming appearance and rich flavor will surely impress your family and friends, making them a festive hit at any gathering.
By following this recipe, you will create beautiful mini cheesecakes that embody the spirit of Christmas. Enjoy the process of making them and let your creativity shine through the decorations. Happy baking!
Recipe Card
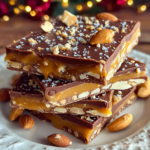
Delightful Christmas Toffee Bark Recipe
Ingredients
- 1 cup unsalted butter
- 1 cup granulated sugar
- 1 teaspoon vanilla extract
- 8 ounces semi-sweet chocolate
- 1 cup chopped nuts pecans or almonds
- 1/2 teaspoon sea salt
Instructions
- Prepare the baking sheet with parchment paper.
- Melt the butter and sugar in a saucepan over medium heat.
- Add vanilla extract to the melted mixture.
- Pour the toffee mixture onto the prepared baking sheet and spread evenly.
- Sprinkle chopped nuts atop the toffee while it's still warm.
- Melt the semi-sweet chocolate and pour over the toffee and nuts.
- Allow the bark to cool completely before breaking into pieces.
- Store the Christmas Toffee Bark in an airtight container.
Notes
Additional serving suggestions: pair with a crisp salad, garlic bread, or roasted seasonal vegetables for balance.
For make-ahead, prep components separately and assemble just before heating to preserve texture.
Taste and adjust with acid (lemon/vinegar) and salt right at the end to wake up flavors.