Introduction
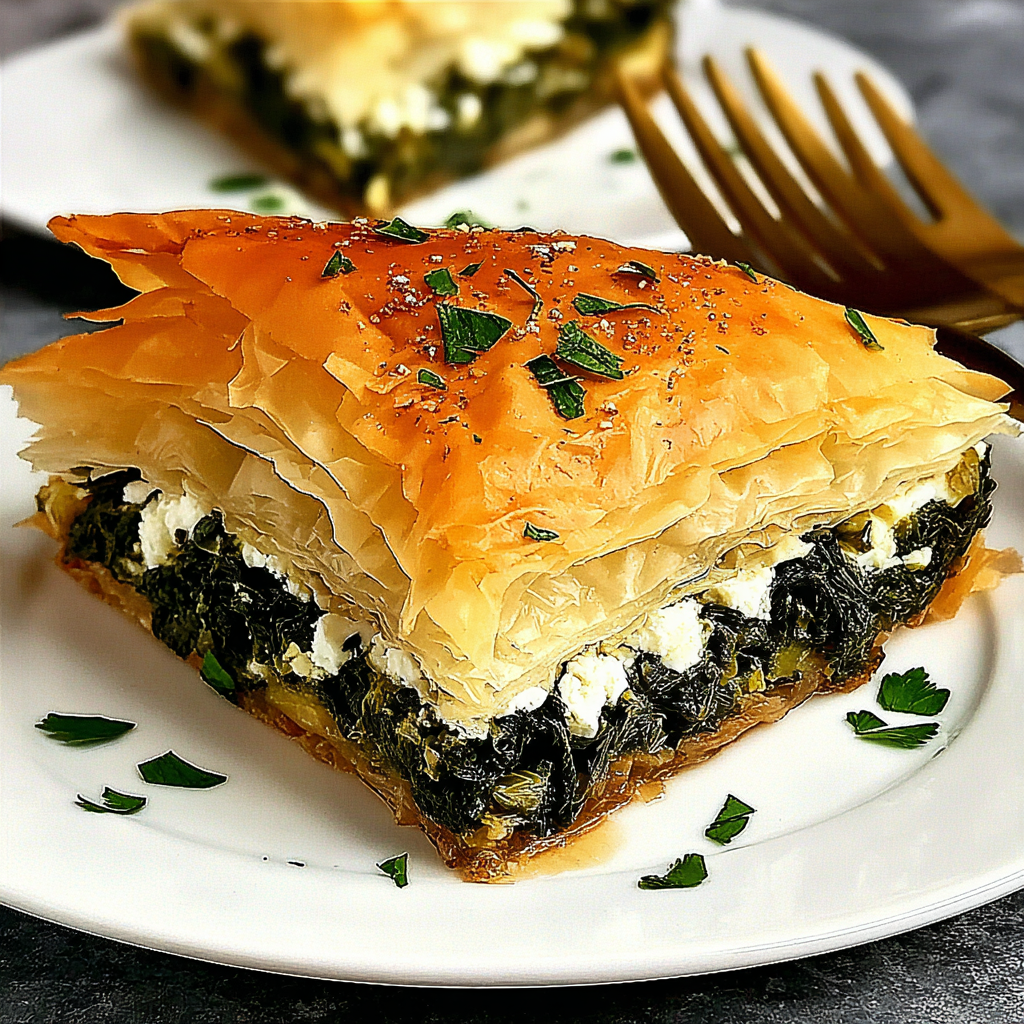
Spanakopita, the beloved Greek dish of flaky pastry filled with spinach and feta, is both an art and a culinary tradition that has stood the test of time. Its charm lies in its golden, crispy layers of phyllo dough encasing a savory filling, creating a delightful contrast in texture and flavor. Each triangle offers not only a taste of Greece but a connection to its rich cultural heritage.
Making traditional spanakopita triangles at home may seem daunting, but with the right guidance and a bit of patience, you’ll be able to create restaurant-quality pastries. The balance of fresh ingredients, peppery spinach, and creamy cheese results in an irresistible filling that is worth every effort. Gather your ingredients, roll up your sleeves, and let's embark on this culinary journey.
Ingredients
- 1 pound spinach, fresh or frozen
Spinach forms the base of the filling and contributes a nutritious element, rich in vitamins A and C. Fresh spinach provides a brighter flavor, while frozen spinach is convenient and easier to prep. - 1 cup feta cheese, crumbled
Feta adds creaminess and a tangy flavor that balances beautifully with the spinach. It brings a distinct saltiness that enhances the overall taste of the spanakopita. - 1/2 cup onions, finely chopped
Onions sautéed until soft add sweetness and depth to the filling. They are essential for providing a layer of flavor that enhances the spinach and feta. - 2-3 tablespoons olive oil
Olive oil not only helps to sauté the onions but also lends richness and enhances the flavor profile of the dish. It's a key ingredient in Greek cuisine. - 1/2 cup fresh dill, chopped (or 2 tablespoons dried)
Dill imparts a fresh, herbaceous note that is characteristic of traditional spanakopita. It pairs wonderfully with the spinach, elevating the filling. - 1/2 teaspoon salt
Salt brings all the flavors together and is especially important in enhancing the taste of the spinach and feta. - 1/4 teaspoon black pepper
Black pepper adds warmth and a touch of spice to the filling, balancing the richness of the feta. - 1 package phyllo dough (about 1 pound)
Phyllo dough is the key ingredient for achieving the signature flaky layers of spanakopita. It creates a delightful crisp texture when baked. - 1 stick unsalted butter, melted
Melted butter is used to brush between layers of phyllo, ensuring they bake up golden and crispy. It adds richness and flavor to the finished pastries.
Directions & Preparation
Step 1: Prepare the filling by sautéing the onions in olive oil.
Begin by heating olive oil in a skillet over medium heat. Add the finely chopped onions and sauté until they become translucent and soft, about 5 minutes. This step is crucial, as it really brings out the sweetness of the onions and forms the aromatic base for the spinach filling.
Step 2: Add the spinach to the skillet, cooking until wilted.
If using fresh spinach, add it to the skillet in batches, ensuring it wilts down before adding more. If using frozen spinach, add it directly and allow it to cook until any excess moisture evaporates. This step is key to avoiding a soggy filling.
Step 3: Mix in the feta, dill, salt, and pepper.
Remove the skillet from heat and allow the mixture to cool slightly. Then, crumble in the feta cheese, add the fresh dill, salt, and pepper. Stir until well combined. This creates a cohesive filling that is flavorful and aromatic.
Step 4: Preheat your oven to 375°F (190°C) and prepare a baking sheet.
While preparing the filling, preheat your oven to ensure it’s hot enough for baking. Line a baking sheet with parchment paper to prevent sticking and facilitate easy cleanup.
Step 5: Unroll the phyllo dough and cover with a damp cloth.
Phyllo dough dries out quickly, so keep it covered as you work. This prevents the sheets from becoming brittle and difficult to handle, allowing for easier assembly of the triangles.
Step 6: Lay one sheet of phyllo on a clean surface and brush with melted butter.
Place the first sheet of phyllo dough on your work surface. Use a pastry brush to generously apply melted butter over the entire surface. This enhances flavor and ensures crispiness with each layer.
Step 7: Fold the phyllo dough in half lengthwise.
By folding the phyllo, you create a sturdy base for your filling. This method also adds extra layers, resulting in a flakier texture once baked.
Step 8: Place a spoonful of filling at one end, then fold into a triangle.
Scoop a tablespoon or so of the spinach-feta filling onto one end of the folded phyllo strip. Carefully fold the pastry over the filling to form a triangle, continuing to fold in a triangular shape until you reach the end. This technique encases the filling perfectly.
Step 9: Repeat the process with remaining ingredients and place on the baking sheet.
Continue filling and folding your spanakopita triangles, placing them on the prepared baking sheet. Ensure they are spaced out to allow for even baking and browning.
Step 10: Brush the tops of the triangles with more melted butter before baking.
Before sending the spanakopita to the oven, brush the tops with additional melted butter. This step helps achieve that golden, crispy exterior that is so characteristic of this dish.
Step 11: Bake in the preheated oven for 20-25 minutes or until golden brown.
Watch the spanakopita closely as it bakes, as oven temperatures can vary. You want them to be golden and crisp; if they start becoming too dark, rotate the pan or cover loosely with foil. Allow the triangles to cool slightly before serving.

Choosing the Right Spinach
Fresh spinach lends a vibrant flavor to spanakopita, but you can also use frozen for convenience. If using fresh, be diligent about washing and drying it well to remove any grit. For frozen options, ensure it’s thawed and excess moisture is squeezed out to prevent a watery filling.
Perfecting Phyllo Dough Technique
Handling phyllo dough takes practice, but don’t be discouraged. Keep the unworked sheets covered with a damp cloth to prevent drying. Use butter liberally to ensure each layer adheres and crisps nicely in the oven, resulting in that beloved flaky texture.
Serving Suggestions for Spanakopita Triangles
Spanakopita triangles are perfect as an appetizer or as part of a meze platter. They pair wonderfully with tzatziki for a refreshing dip. Serve them warm, alongside a simple salad drizzled with olive oil and lemon, allowing the flavors to complement one another beautifully.
FAQs
What can I do if my triangles are too thick?
If the filling prevents the phyllo from folding easily, ensure you’re using a smaller portion of filling. You can also roll out the phyllo dough with a rolling pin to make it thinner.
How do I prevent my filling from being bland?
Ensure you taste your filling before assembling the triangles. Adjust the seasoning with additional salt, pepper, or herbs if needed, as these will elevate the overall flavor.
What should I do if my spanakopita crust is overcooked?
If you experience overcooking, it may be due to baking at too high a temperature or for too long. Monitor the baking closely and adjust your temperature down slightly next time, if necessary.
Can I substitute other cheeses for feta?
Yes, you can use ricotta or goat cheese as a substitute for feta in the filling, but be mindful that this will change the overall flavor profile and saltiness.
What can I use instead of dill?
If you don’t have dill on hand, fresh parsley or mint can work as alternatives, providing a different yet pleasant flavor in your spanakopita filling.
Is there a way to improve the flavor of the spinach mixture?
Try adding a splash of lemon juice or zest to the filling. This brightens the flavors and balances the richness of the feta.
Conclusion
Creating traditional spanakopita triangles offers a rewarding kitchen experience that results in a dish steeped in culture and flavor. Each bite is a testament to the love and skill you’ve invested in your cooking.
Enjoy sharing your homemade spanakopita with family and friends, and don't hesitate to experiment with variations in the filling or spices to make it your own. Embrace the joy of cooking and the comfort these delicious treats bring.
Recipe Card

Mastering the Art of Traditional Spanakopita Triangles
Ingredients
- 1 pound spinach fresh or frozen
- 1 cup feta cheese crumbled
- 1/2 cup onions finely chopped
- 2-3 tablespoons olive oil
- 1/2 cup fresh dill chopped (or 2 tablespoons dried)
- 1/2 teaspoon salt
- 1/4 teaspoon black pepper
- 1 package phyllo dough about 1 pound
- 1 stick unsalted butter melted
Instructions
- Prepare the filling by sautéing the onions in olive oil.
- Add the spinach to the skillet, cooking until wilted.
- Mix in the feta, dill, salt, and pepper.
- Preheat your oven to 375°F (190°C) and prepare a baking sheet.
- Unroll the phyllo dough and cover with a damp cloth.
- Lay one sheet of phyllo on a clean surface and brush with melted butter.
- Fold the phyllo dough in half lengthwise.
- Place a spoonful of filling at one end, then fold into a triangle.
- Repeat the process with remaining ingredients and place on the baking sheet.
- Brush the tops of the triangles with more melted butter before baking.
- Bake in the preheated oven for 20-25 minutes or until golden brown.
Notes
Additional serving suggestions: pair with a crisp salad, garlic bread, or roasted seasonal vegetables for balance.
For make-ahead, prep components separately and assemble just before heating to preserve texture.
Taste and adjust with acid (lemon/vinegar) and salt right at the end to wake up flavors.